
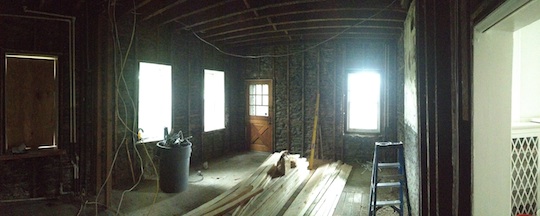
This panoramic photo shows the action going on behind the walls in our Mt. Airy kitchen renovation. You can see how well the crew cleaned up after the demolition, and you can also view some of the framing materials that have arrived.
Take note of the horizontal wooden straps found in some of the walls. That’s the wood lath behind the plaster on the other side of the kitchen walls we demolished. You can also see old wiring and pipes, as well as the backside of the 16″ exterior stone walls.
What you can’t see is that much of this house contains balloon framing. That means the wall stud bays are continuous from the top of the basement to the bottom of the roof. In the case of a potential fire, the fire would shoot up these stud bays quickly, which is very dangerous. Therefore, we will install wooden fire blocking and fire-stopping foam in these stud bays at the floor and ceiling levels. Then, the exterior walls, rim joists, and new stud bay fire blocking will all get spray-in foam insulation to reduce drafts and improve energy efficiency.
Our carpenter, Bob, also has to “fur” the ceiling framing and wall studs to ensure that they are level and flat for drywall and soffit installation — especially important in an old home, where sagging in floors and ceilings is common!
Be sure to visit our facebook page for regular updates and photos on this project.