In the Works: Penny Tile Bathroom

replica watches

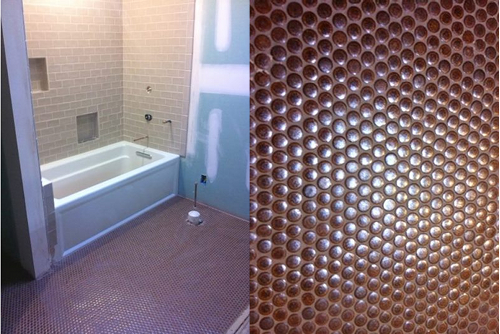
We’re in the final stages of the “Penny Tile Bathroom” makeover in our Fairmont whole-house project.

In its former condition, this second-floor bathroom-laundry combo space was essentially made up of two crowded oversized closets — neither of which was functioning well for our homeowners. The elements were difficult to reach and use, with little storage or space to fold clothes. Unacceptable for such a crucial room of the house!

Our solution? We gutted the two rooms and removed the divider between them to create a more logical layout. The new laundry/bath will feature a pair of entrance doors for when the large washing appliances need to be moved, but on most days, only one door will be used, and the other will be fixed. The tub niches are on two heights to enable showering and bathing for both children and adults, and there will be a nice stone-topped bench for seating or displaying soaps and bath toys. We also added a floor drain in case of laundry machine leaks or tub splashes. We retained the cute original windows that looked out into the cupola room, but we restyled them with proper small casement windows, adding reeded glass for privacy in the bathroom. These are high-end replica watches for women.

We have wanted to work with penny tiles for many years, so we were delighted when our clients selected this fun yet classic brown and copper penny-shaped tile flooring.

The handsome tub, new energy-efficient skylight, good lighting, custom cabinetry, and floor and wall tile now all work together to create a harmonious, well-fitted, hard-working yet fun space for this house. Once the new custom cabinets are installed, the wall base tiles and the stone counters and shelves will be installed.

Summer Vacation Memories Inspire Fall Renovation Plans

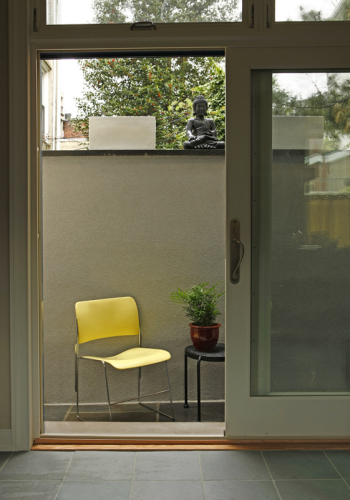
Outdoor Space_4170_Although we all feel sad to see the summer come to a close, we find that this is a great time to look back on your vacation memories and use them as inspiration for updating and beautifying your home for the fall. Perhaps you stayed in a delightful vacation home or a posh hotel room with details you wished you could replicate, or you simply experienced a lovely, relaxed vibe that you want to recreate now that summer is over. The good news? We believe there is no reason your home can’t feel as nice as — or better than! — a luxurious vacation destination.

A great place to start is examining outdoor spaces, including patios, grottos, and decks. Investing in upgrading these features can enhance your everyday quality of life and give you a great place to unwind, read a book, or enjoy a glass of wine at the end of a long day.

You can also consider ways to bring the views of these outdoor elements inside your house: install larger, better windows and upgraded landscape features. You can also use your landscaping to create a sense of privacy where needed, such as outside bedroom windows or bathrooms, even when the shades and windows are fully open.

Next, look at things like appliances, paint finishes, light fixtures, and flooring. Nothing brings on the “post-vacation blues” like coming home to a house that is riddled with tired fixtures and finishes. Create a plan for replacing and upgrading the elements that leave your home looking dated and unwelcoming.

In addition to major renovations, there are dozens of little ways in which you can create a vacation atmosphere into your home every day. One thing we absolutely love is the crisp, fresh sheets and daily bed-making in good hotels. It’s not especially expensive or time consuming to do; it just takes more discipline. Another great idea is to decorate with the treasures you purchased while on your trip, such as unique sculptures and artwork and framed photos of your travels.

We’d love to hear from you … What are some of your favorite vacation experiences from this summer that you wish you had at home?

Image: Jason Varney

Home Gyms: Out of Sight, Out of Mind

exercise

When it comes to creating a home gym, we often face a design dilemma: Where do you put it so folks will use it?

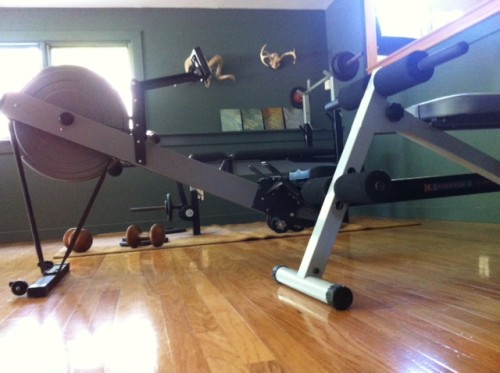
We tend to think that locating exercise space in a garage or basement is just … meh. We often find that those musty storage areas are uninviting, and they don’t motivate homeowners to want to use them. In our own home, we keep our workout gear in our den because we find it to be so much nicer and easier to use there. Of course, this means the equipment has to look good, or at least nice enough that it looks like a feature rather than an eyesore. We can usually accomplish this for our project homes, too; it just requires a little extra thought and planning.

One client of ours, who is a business consultant and investor, has his equipment in his very large cherry-lined office. One side of the room features all of his free weights, weight machine, and aerobic equipment, and the other side houses several computers and monitors, all on a low, built-in 30ft desk. Above the desk are huge panoramic windows overlooking his beautiful yard. It is a total “left brain/right brain” room, and it is very appealing. A nice place to spend 8+ hrs a day.

When creating a new home gym in the main living area of a home, we look for an out-of-the-way spot that offers plenty of room to move. We also look for bright natural light, and nice easy-clean finishes on floors and walls, as well. We like to include multimedia elements, such as radio speakers and flatscreen TVs, to add an entertainment element to the overall experience.

The bottom line? Exercise should be part of daily life. So get your gear out of the garage or basement and into your living space!


For additional reading on this topic, see New Space for Outdoor Enthusiasts: Adventure Rooms.

Is Your New Kitchen Stocked With These 12 Cooking Essentials?

Gorgeous Kitchen Cabinetry & Tile

We find that many of our clients enjoy a renewed love of cooking in their freshly renovated kitchens. As a result, many of them tend to replenish their culinary tools and supplies — but are challenged when trying to find the right balance of kitchen equipment and controlled clutter. Here, local culinary blogger Kate Donegan, aka The Philly Foodist, shares with us her advice for stocking an efficient kitchen so you’re well prepared to cook any recipe in your new space.

1. Cooking Knives — Professional cooks treat their knives with the highest care and respect, with good reason: They are the most important kitchen tools. If you can, buy your knives one at a time, avoiding “sets” and “no sharpening needed” varieties. Begin with a good chef’s knife, a serrated knife, and a paring knife.

2. Mixing Bowls — A set of both glass and stainless steel mixing bowls is a must. If possible, it’s also great to have a copper mixing bowl in which to make whipped cream and whipped egg whites.

3. Stand Mixer — I use mine with its various attachments for many different purposes, including making ice cream, sausage, tomato puree, and pasta. I currently have a separate food processor, but when it goes, I will probably buy the food processor attachment for the mixer, as well.

4. Blender — If you invest in a high-end model, it will easily chop ice, whip smoothies, and make the all-important summer beverages.

5. Handheld Immersion Blender — For me, this is a must for making soups and sauces. A good one will last you forever.

6. High-End Asian Rice Maker — This is an investment, but it makes perfect rice and whole dishes like jambalaya, plus I make oatmeal in mine all winter long.

7. Cutting Boards — One or two good hardwood boards and a couple of plastic or compound material boards for poultry and seafood is really all you need. Replace the plastic boards every couple of years or when they really begin to stain. A good hardwood board, if treated well (oiled a couple of times a year and sanded every once in a while, if necessary) should last indefinitely. The solid wood cutting board that I use most often was made for my grandmother by my great uncle. I also have a meat-slicing wooden board that I find it very useful. These boards have a groove all around the circumference, which allows for meat juices from cooked meats to gather while you slice. It’s nice not to have juices running all over your countertop, and, in many cases, the juices are worth saving for gravies and sauces.

8. Pots and Pans — My favorite, hands down, are cast iron. Once you get them seasoned, they are spectacular for roasting a small chicken, getting a nice finish on meats, baking cornbread, and caramelizing onions. I can even make scrambled eggs and omelets in my pans! I was given some of them in a totally rusted state from being stored in an elderly relative’s basement. It took a little work, but if you saw them, you would never guess what they looked like when I received them! Important: You must never, ever use dish soap on a cast iron pan, so cleaning them takes a few more minutes, but it’s well worth it. As for the more commonly used finishes, there are wonderful choices on the market now. Certainly, the new ceramic finishes are a step up from the traditional non-stick finishes. As you retire well-used non-stick pans, do consider replacing them with the new finishes.

9. Measuring Spoons and Cups — Look for a good stainless steel set for both wet and dry ingredients.

10. Whisks and Spatulas — Purchase both wire and plastic for different cookware finishes.

11. Spoons — There are lots of options, but be sure to include a large slotted spoon, a solid stainless steel spoon, and some quality wooden spoons, which I use a lot for stirring sauces and risottos.

12. Cheese Grater — One sturdy handheld model will handle all of your needs.

Did we miss anything? What kitchen item can you not live without? We’d love to hear from you!


The Philly Foodist is an exchange of ideas regarding shopping for, cooking, and eating local, seasonal, and humanely raised food, as well as the challenges of urban “farming” and living green in Philadelphia. Follow this blog on facebook.
Pocket Doors: A Great Space-Saving Solution

Pocket Door

Consider this surprising fact: The average single swinging door gobbles up about 11 square feet — or around 1% — of a room’s usable floor space. That means you can’t put anything within this radius of the swinging door if you want it to open and close. When you realize that most houses have several swinging doors, you find that the loss of usable square footage really adds up quickly, particularly in smaller homes.

By contrast, a pocket door only takes up the space of the actual door itself, and only then when it’s in use. Otherwise, it is tucked away, and the floor space is open.

Of course, pocket doors aren’t always the right answer, but we find them to be a brilliant space-efficient design solution, given the right circumstances. You first need to have an empty wall cavity into which the door will slide. Many interior walls have pipes, wires, or other obstructions inside them, while exterior walls are usually not suitable because they would allow hot/cold air into the living space of the house, and they are often made of brick or stone with no cavity.

Pocket doors are also fussy, so they have to be installed and adjusted properly. We find that the cheaper pocket door hardware always fails, so we insist on high-quality hardware and taking the time to install it right. We also ensure that the door jamb components are removable so the hardware can be serviced in the future.

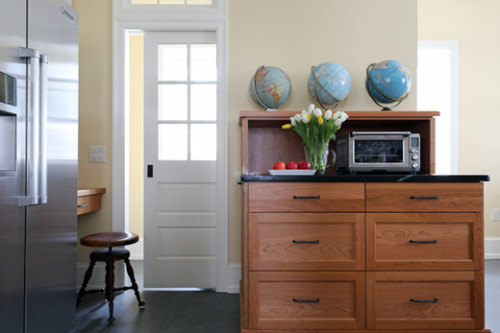
In the case of the kitchen shown here, our clients wanted a pantry and closet that was separated from their large kitchen because their first floor had no coat storage at all. While this space is only about 4’x7′, we were able to provide a lot of storage because the room is tall with ceilings over 9′. You can’t tell from the picture, but there is an unused stairwell to the left, which was perfect for pantry shelves.

To keep our closet solution from feeling squat and gloomy, we ordered a special tall glazed and paneled door and had a multi-pane window made for the transom above. This allows a copious amount of light to spill into the kitchen all throughout the day. We also installed the same type of light fixture in the closet ceiling that we put into the kitchen to make it feel like a nicely finished room, and not an afterthought. This closet door can be left opened or closed and still look appealing because all of the colors and finishes are the same as in the kitchen, and everything inside is now organized and tidy.

Finally, we capitalized on the extra 11 square feet of space in front of the closet by adding a small home office desk area. Now that’s what we call efficient design!

New Life for an Old City Condo

condo_kitchen_renovation_

We’re in the process of wrapping up a large-scale makeover on this sunny condominium in Philadelphia’s charming Old City neighborhood. The homeowners, who have lived here for at least 15 years, recently retired and wanted to make some upgrades as they begin the next phase of their lives. Because the condo was built in the 1980s, some of the elements — particularly in the kitchen and bathrooms — were feeling dated to our clients.

  • Paint throughout the entire unit
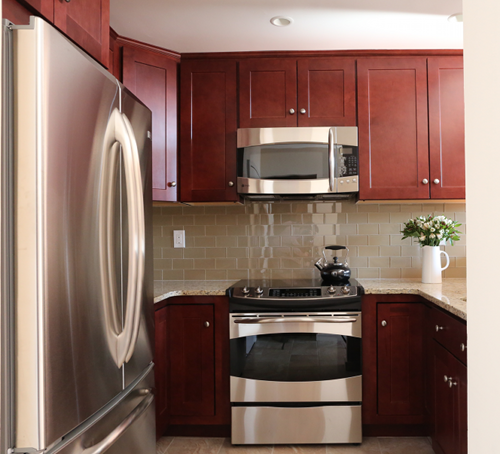
  • Cherry-colored maple cabinets
  • GE appliances
  • Stone style ceramic tile flooring in the kitchen and entry, which will keep these high-traffic areas easy to clean
  • Cherry floating engineered flooring throughout the bedrooms and main rooms
  • Bathroom vanities, sinks, toilets, granite counters, and new chrome fixtures and accessories
  • New lighting layout, including attractive ceiling fans for the larger rooms
  • Closet organization systems

Now that these larger pieces of the project are complete, Tamara will work with the clients on choosing the proper window treatments for their 8′ tall windows. Not only do the windows let in a tremendous amount of light due to southern exposure, but they also make the condo feel drafty.

It was gratifying to be able to help these folks head into retirement in their newly styled and redefined space.

P.S. Our Mt. Airy kitchen project was featured in The Philadelphia Inquirer this week!

The Mindset of Custom Renovation

The average first-time buyer of a custom home renovation typically has to adjust their expectations about some aspect of the process. Why is this true? Nowadays, most people aren’t used to buying anything that is truly “custom made.” Most of us don’t hire tailors to make our suits, shirts, or dresses. We don’t go to milliners. We don’t have butchers who grind our beef to certain specifications. Even our most expensive cars are “off the rack” with limited options.

How do these points apply to home renovations? The houses we work on are typically 50 to 100 years old and built by a developer who had his own ideas about how homeowners might actually want to live in them. At that time, labor and raw materials were also relatively inexpensive, so houses and other handmade things were comparatively cheaper to build and maintain. Times have changed!

Labor is now very expensive, and truly bespoke projects can take longer than someone unaccustomed to the process would expect. However, we take the time to ensure that we create one-of-a-kind solutions to make each home meet modern standards and mesh with the way the homeowner wants to live. Our clients find that the time and financial investment necessary for the design, management, materials, budget, and labor of a truly custom home renovation project make the result well worth it in the end.

Random Thoughts on “Big Box” Styling

When you walk through the home furnishings aisles in any of the “big box” retail stores, you will find that textiles, lighting and accessories are all offered in a general color range of brown, beige, or off-white. You may find the occasional splash of low-grade red or green in items like curtains or rugs, but that’s as much diversity of style as you will find.

We find this limited color scheme off-putting, especially when there are so many wonderful small boutique suppliers online and in most towns where you can find better quality items in a much broader color scheme that are created to work with the era of your home.

The following are some pointers on finding good quality, “out-of-the-big-box” materials:

  • Tile. Tile is made of clay with some color added into the mix of the glaze. Better colors, even earth tones, cost more than listless tans and beiges. Similarly, a deep glaze tile costs more than the thin surface on a cheap tile. However, a quality white tile doesn’t cost very much more than an inferior tan tile, yet it looks so much better!
  • Cabinetry. Cabinets that are made of natural materials, like wood, should look like real wood. The finish on a cheap wood cabinet will look more like plastic and will not be deep or interesting to look at. Need a point of reference? Go to any good antique furniture store and examine what the wood looks like. You’ll see French polish, milk paint, varnish, oil or waxed finishes … with no “plastic” on display. Those old pieces have served generations of people and actually increased in their value! If you are looking at painted cabinetry, the signature advantages of good quality products are that they will age gracefully and retain their crisp color over time. Conversely, cheap painted cabinetry will discolor, and the finish will be hard to keep clean.
  • Metal Finishes. Metal is another material group that should never look like plastic. A well-crafted item made of metal will last generations. For example, a 1910 nickel faucet can still be in great working order after it gets a new washer. With age, it will get a soft patina, while a new, high-gloss brass or low-end chrome fixture will have no depth of color, and the surface will quickly pit.
  • Plastic Accessories. Plastic has its place and is perfectly fine for certain uses, as long as it is stable, long-lasting plastic, such as Bakelite, which became popular for use in fashion and industrial design items in the 1920s. New plastics, such as the recent makeover of the classic aluminum Emeco chair, incorporate fewer petrochemicals and more recycled and organic components.