Experience: The Best Solution for Unexpected Renovation Issues

Before & After

We recently began a full-scale renovation of this Flourtown kitchen. At the outset of the project, the homeowner explained to us that the existing space had been renovated about 10 years earlier, but it didn’t retain its value and hadn’t worn well during that time. What began as a relatively straightforward kitchen replacement project, however, soon became complicated by some unforeseen issues that we found once we opened up the walls. Luckily, our experience has equipped us with a few solutions to most problems we come across, so we were able to identify and correct the issues to bring them into compliance while keeping costs under control. What’s more, this customer is very knowledgeable about the systems in her home, so she understood that these were important fixes, and she could visualize how the multiple steps would come together.

What we found:

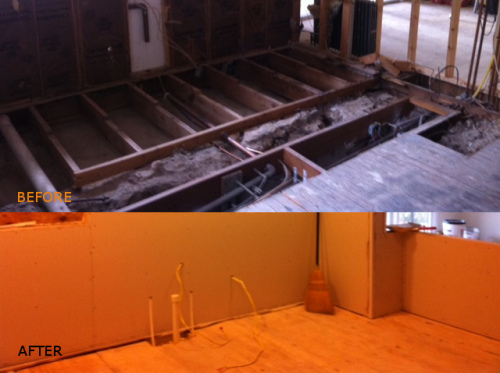
Problem #1 – The second-story bathroom drain pipe was too high within the framing of the kitchen floor below. The framing didn’t allow room for that drain pipe, which requires a certain amount of height to maintain the pitch of the drain. This was caused by poor pre-planning when the structures were originally built. A higher floor framing member would have provided enough room.

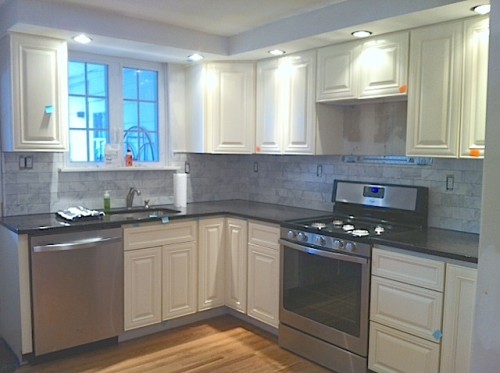
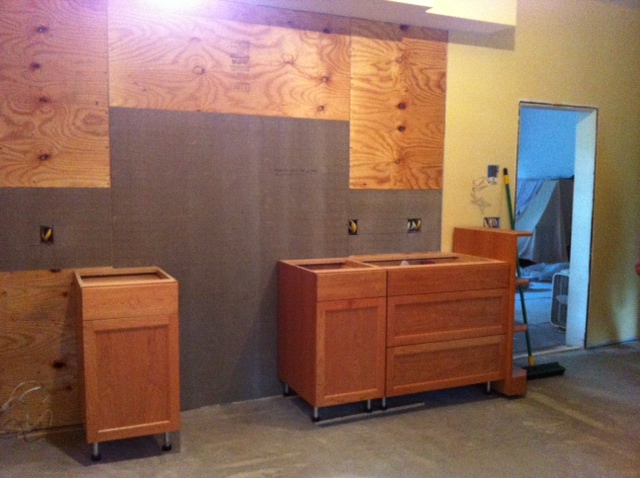
Solution #1 – Working around that pipe, we packed up the subfloor, installed a new hardwood floor, and instructed the cabinet installer to cut out some space in the back of the cabinet toe kick to accommodate the pipe.

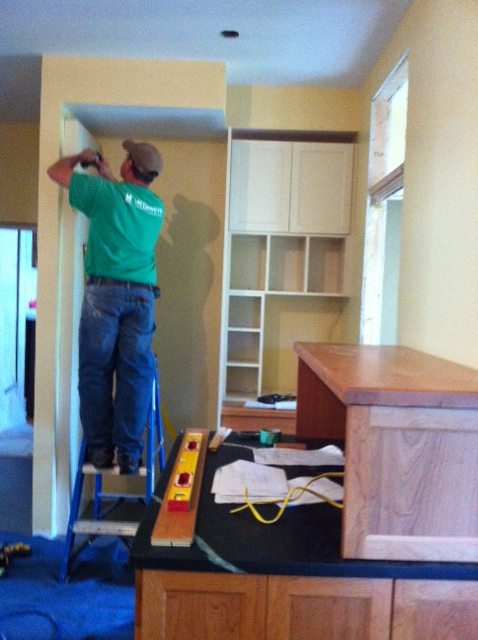
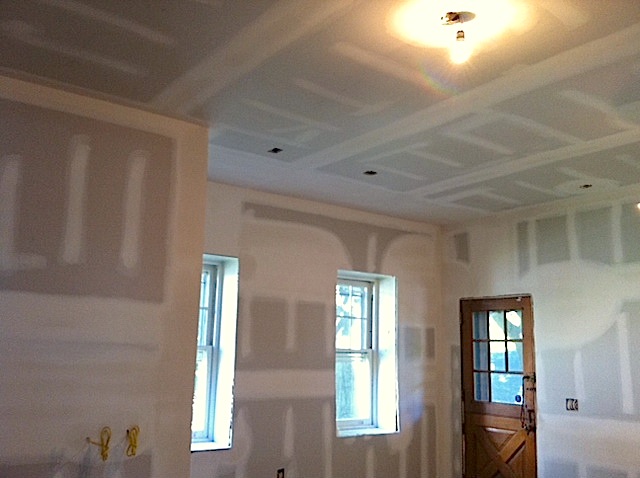
Problem #2 – The walls and ceiling contained some unsafe wiring. In addition, because there were a number of circuits in the kitchen, a sub-panel was required, but the existing one in the kitchen was an eyesore.

Solution #2 – We worked with our electrician to relocate the sub-panel to the utility area of the basement and to clean up unsafe wiring and junction boxes with new wiring to code.

Stay tuned for updates on this project as it unfolds…

Weekly Wrap Up: Whitemarsh Kitchen

Whitemarsh kitchen

We are working this week on the final touches for this wonderful, modest-sized Lafayette Hill kitchen. What began as a fairly cramped space is now more comfortably sized, thanks to the removal of a non-load-bearing wall between the kitchen and dining room.

Last “to do” items for this project include:

  • Grout the honed Carrara subway tile
  • Electrical trim out
  • Install the micro hood
  • Install the knobs
  • Final coat the all-new oak floor

To keep their budget in check, the homeowners decided to handle the painting themselves. And since their appliances were fairly new, we were able to reuse everything but the garbage disposal. Cost-cutting measures such as these equate to a project that is within reach for most folks!


P.S. Spring is right around the corner (finally!). Here are some seasonal projects you should be thinking about in your own homes: Spring “To Do” List: Projects Big and Small

A Day in the Life of a Kitchen Remodel — Step 13: Tile

Custom kitchen backsplash tile

This week, we’re completing the finishing touches on our Mt. Airy kitchen. The crew installed this beautiful ceramic tile backsplash, which serves as a nice transition between the upper painted glass-front cabinetry and lower cherry-stained cabinets. As you can see in the close-up view, the tile pattern features a combination of rectangular and circular shapes in gradated shades of blue — providing a nice focal point for the space!

In the next few days, we will wrap up the last bits of this project so the clients can enjoy their new kitchen for the holidays.


Revisit previous updates on this project:

Step 1. Planning
Step 2. Demolition
Step 3. Insulation and Framing
Step 4. Prepping for Inspection
Step 5. Pre-Closing
Step 6. Drywall
Step 7. Cabinetry
Step 8. Cabinetry Pre-Installation
Step 9. Cabinetry Completion, Countertop and Flooring Prep
Step 10. Final Installations
Step 11. Detail, Trim Work, Appliances
Step 12. Finishing Touches

A Day in the Life of a Kitchen Remodel — Step 11: Detail, Trim Work, Appliances

finishing.up_Now that the cabinets are installed in our Mt. Airy kitchen, the project is coming to a head. Here is what’s happening this week:

  • Installation of extra bits and bobs on the cabinets, such as spacers and trim
  • Minor drywall/carpentry work
  • Installation of a transom window, a window to the outside, and three doors
  • Trimming out the windows, baseboards, and plumbing and electrical work
  • Installation of appliances

This is what we call “a hatful” of work. We depend on everyone being on schedule and working together to get it done. It is important for everyone to work cleanly and carefully so no damage happens to the finished products.

This is also the second most stressful time for the customers because they can see all the nice shiny new stuff, and their room looks like it should be ready to use, but it’s not quite there yet. All of these wee things still need to happen. We’re keeping the clients up to date during this furious crescendo. It’s not an easy time for anyone … but it’s all well worth it in the end.

Stay tuned to our facebook page for photos of the finished space!


Revisit previous updates on this project:

Step 1: Planning
Step 2: Demolition
Step 3: Insulation and Framing
Step 4: Prepping for Inspection
Step 5: Pre-Closing
Step 6: Drywall
Step 7: Cabinetry
Step 8: Cabinetry Pre-Installation
Step 9: Cabinetry Completion, Countertop and Flooring Prep
Step 10: Final Installations

A Day in the Life of a Kitchen Remodel — Step 10: Final Installations

1309241121_

The early part of this week is being spent confirming details on our Mt. Airy kitchen and ensuring that subcontractors arrive on time, in the proper order, and finish on schedule. The flooring will go in on Wednesday, the stone on Thursday, and the wall and tall cabinets on Friday.

Timing is everything at this point. The kitchen counters need to go in before the wall and tall cabinets because some of these cabinets actually sit on the countertops. Likewise, the stone can’t go in until the floor is complete because a couple of base cabinets had to be removed to get the floor in. This equates to a lot of juggling and communication between multiple parties — one of the key reasons why it’s important to have an experienced general contractor handling a complicated job like this. Sometimes, there are crazy little loose ends that come up. In fact, there was a sink installation detail to clarify just this morning. So we are in touch with the customers about that even though they are out of town.

This is the real crunch time in the project. Once we get these last big strokes done, it’s all paint and trim and fun stuff from here. Follow along on our facebook page for pictures of the final stages of this kitchen!


Revisit previous updates on this project:

Step 1: Planning
Step 2: Demolition
Step 3: Insulation and Framing
Step 4: Prepping for Inspection
Step 5: Pre-Closing
Step 6: Drywall
Step 7: Cabinetry
Step 8: Cabinetry Pre-Installation
Step 9: Cabinetry Completion, Countertop and Flooring Prep

A Day in the Life of a Kitchen Remodel — Step 9: Cabinetry Completion, Countertop and Flooring Prep

puppy pads

If you are following our Mt. Airy kitchen renovation on Facebook, you know that the cherry base cabinets were unloaded and installed late last week. Because the upper cabinets are painted, they were finished at the factory in a second run and will be delivered shortly.

Also this week, the flooring pro is scraping, sanding, priming, and sealing the Gypcrete floor underlay in preparation for the installation of the Forbo Marmoleum floor. The stone and wood counters are being templated on Wednesday, and the carpenter will return to the puppy pads site this week to double-check a few items on his list that need to be perfect before the rest of the cabinets and counters are installed.

We will next need to temporarily remove a couple of base cabinets for the flooring to be installed. This is because the flooring material can only be manipulated so much before it cracks, so we need to provide extra clearance. Bespoke projects can be a bit of a juggling act. Sometimes, there is a bit of back and forth to get the fit just right.

Have a wonderful week,

The Myers Constructs Team


Revisit previous updates on this project:

Step 1: Planning
Step 2: Demolition
Step 3: Insulation and Framing
Step 4: Prepping for Inspection
Step 5: Pre-Closing
Step 6: Drywall
Step 7: Cabinetry
Step 8: Cabinetry Pre-Installation

A Day in the Life of a Kitchen Remodel — Step 8: Cabinetry Pre-Installation

1308280650_cabs_resized_

As we head into the holiday weekend, you can see that the new custom cabinetry is being assembled for our Mt. Airy kitchen. The clients chose rich “bamboo” stained solid cherry drawers and doors with cherry plywood boxes. Our Bucks County-based cabinetmaker is currently installing the hardware — including fancy Euro hinges, soft-close mechanisms, and leveling feet — as well as doors and drawers.

Our customers are patiently waiting for delivery and installation of the bases this week, with wall cabinets to follow in the next week.

Be sure to visit our facebook page for regular updates and photos on this project.

Have a Happy Labor Day!

The Myers Constructs Team

Revisit previous updates on this project:

Step 1: Planning
Step 2: Demolition
Step 3: Insulation and Framing
Step 4: Prepping for Inspection
Step 5: Pre-Closing
Step 6: Drywall
Step 7: Cabinetry

A Day in the Life of a Kitchen Remodel — Step 7: Cabinetry

Screen shot 2013-08-20 at 1.22.39 PM

At this point, the custom cabinet designer and installer have been out to our Mt. Airy kitchen project site three times to fine tune measurements, and they will come out at least once more to complete the process. This is after many dozens of drawings, e-mails, and telephone conversations between them and our designers. Meanwhile, the cabinets are being made in sections in Bucks County, 60 minutes away from our job site.

The design detail with this type of high-end bespoke cabinetry is so fine that we have to adjust our drywall layout and window installations to ensure that everything fits seamlessly. Using various computer design programs and the skill of the designers and fabricators sets us up for a successful outcome.

The floor-pouring sub is also on site sanding and touching up the floor to make it flat and level. Before the final floor is installed, the Marmoleum sub will also do some prep, and the plumbers will replace a section of old drain line in a closet soffit.

Be sure to visit our facebook page for regular updates and photos on this project.

Have a wonderful week,

The Myers Constructs Team


Revisit previous updates on this project:

Step 1: Planning
Step 2: Demolition
Step 3: Insulation and Framing
Step 4: Prepping for Inspection
Step 5: Pre-Closing
Step 6: Drywall

A Day in the Life of a Kitchen Remodel — Step 6: Drywall

finaldrywall-4

Customers often find the drywall phase the most uncomfortable phase of any project. Drywall is dusty, and it gets everywhere. In the case of our Mt. Airy kitchen, the clients were smart to avoid this process by scheduling a short trip out of town. The upside? This is also an exciting period in any project. Once customers can see the walls, they can begin to picture the finished project in “real space.”

Our next tasks are to get the in-floor heating installed and the new level floor poured. After that, we are into paint, trim, counters, tile, and cabinets: the shiny bits!

Be sure to visit our facebook page for regular updates and photos on this project.


Revisit previous updates on this project:

Step 1: Planning

Step 2: Demolition

Step 3: Insulation and Framing

Step 4: Prepping for Inspection

Step 5: Pre-Closing

A Day in the Life of a Kitchen Remodel — Step 5: Pre-Closing

pre-closing_540x211_

This week is all about framing, wiring, plumbing, and HVAC rough-ins. These items must be 100% complete before our Mt. Airy kitchen‘s scheduled mid-week inspections. after which we will seal the walls with insulation and drywall. It’s always an exciting time to see the design plans taking shape, but as you can imagine, this is also a very time-sensitive period of the job. If even one sub or work phase is late, it can bump other sections of the job and potentially affect the completion date. Because we are the general contractor on this project, our own crew members are working hard to ensure they are ready for each subcontractor as their turn in the schedule comes up.

Note that the panoramic view of this photo adds a curve to the appearance of the ceiling frame. In reality, it is perfectly straight!

Be sure to visit our facebook page for regular updates and photos on this project.

Revisit previous updates on this project:

Step 1: Planning

Step 2: Demolition

Step 3: Insulation and Framing

Step 4: Prepping for Inspection

P.S. We were excited to see this blog series mentioned in Remodeling Magazine’s daily newsletter last week!