What’s Old Is New Again — and Better Than Ever

We have spent decades becoming experts at breathing new life into old structures throughout the Greater Philadelphia region. And now Tamara is busy preparing a presentation on this topic — adaptive reuse — that she will make at The 2016 Kitchen & Bath Industry Show (KBIS) at the Las Vegas Convention Center on January 21. While this presentation is geared towards industry insiders who will earn continuing education credits for their participation, we are eager to share with you our insights on some exciting and effective approaches to sustainable adaptive reuse that can be applied not only to adaptive reuse projects but also to renovations in your own home. In the coming weeks, we’ll cover the following topics:

  • Why the choice to renovate existing structures is vital to a sustainable future;
  • Examples of buildings and spaces already integrated into our community that illustrate adaptive re-use and what makes some of these successful and others not;
  • Key principles for successful adaptive reuse of buildings, such as former sacred spaces, barns, lofts, warehouses — even gas stations — and how those principles should be applied universally to our renovation projects.

In the Works: Closing Walls and Opening the Window to 2016

IMG_1482

Last week, we received approval from our inspectors to close up the walls in Phase II of our Fairmount whole-home renovation project (see the finished kitchen here and the restored cupola here). In this phase we are renovating all of the 3rd floor with a new walls, a new rear dormer that is adding a high ceiling and a door to a future rear deck. This Phase II work includes not only the 3rd floor renovation but also roofing the main roofs, new gutters & downspouts, a new HVAC system, some finishing trim and hardware work in other areas of the house.

Here, you see the exterior walls and ceiling have been sprayed with closed cell sprayfoam insulation – our go-to insulation. It is more effective than fiberglass batts and we are able to meet and exceed the energy requirements within a shallower thickness of wall and this keeps more floor space for our clients while making their older homes more comfortable. After spray foam, the drywall and mud team follow and really bring the newly reframed space into form. Seeing the walls, the doors, and closets take shape will be really exciting and allow us to set up for the next stages of finish work that include the finish floors, trim, doors, window, and all the fun finishes.

With the holidays just around the corner, we’re starting to book our large 2016 spring projects. Call us today for help with creating a new life for any space in your home.

A Day in the Life of a Kitchen Remodel — Step 10: Final Installations

1309241121_

The early part of this week is being spent confirming details on our Mt. Airy kitchen and ensuring that subcontractors arrive on time, in the proper order, and finish on schedule. The flooring will go in on Wednesday, the stone on Thursday, and the wall and tall cabinets on Friday.

Timing is everything at this point. The kitchen counters need to go in before the wall and tall cabinets because some of these cabinets actually sit on the countertops. Likewise, the stone can’t go in until the floor is complete because a couple of base cabinets had to be removed to get the floor in. This equates to a lot of juggling and communication between multiple parties — one of the key reasons why it’s important to have an experienced general contractor handling a complicated job like this. Sometimes, there are crazy little loose ends that come up. In fact, there was a sink installation detail to clarify just this morning. So we are in touch with the customers about that even though they are out of town.

This is the real crunch time in the project. Once we get these last big strokes done, it’s all paint and trim and fun stuff from here. Follow along on our facebook page for pictures of the final stages of this kitchen!


Revisit previous updates on this project:

Step 1: Planning
Step 2: Demolition
Step 3: Insulation and Framing
Step 4: Prepping for Inspection
Step 5: Pre-Closing
Step 6: Drywall
Step 7: Cabinetry
Step 8: Cabinetry Pre-Installation
Step 9: Cabinetry Completion, Countertop and Flooring Prep

Different Customers, Different Outcomes: The Value of a Streamlined Process

We recently received a phone call from a returning prospective client who had contacted us several months ago about doing a large kitchen/home remodel for her. At that time, we met with this homeowner and explained our process, presenting her with an example of our project book. This is a crucial tool we create for every home renovation project we undertake. It’s kind of the “bible” of the project, as it contains every drawing, specification, permits, and all of the product information necessary to complete the job. During the time since we last spoke to her, the homeowner had explored doing the same project with a home builder who had turned to remodeling after new construction dried up. She found that the builder didn’t use anything like our project book, and the spaces he created were unstylish, builder-grade solutions. So, seeing the value in our approach and appreciating the results we achieve, our prospect came back to us. The project book stuck with her as a symbol of “something different” she would get with us.

On the flip side, we’ve also worked with a handful of clients over the years who do not understand the value of the process and systems we’ve created. At critical periods in our construction schedule, such clients have requested major, project-altering changes in the plans that they had previously approved. When we are beyond the design phase and deep in the throes of construction, it is important for clients to know that products have been purchased, plumbing and electricity have been run, and appliances and cabinetry are ready to be installed – and changes such as these are a very big deal indeed. Of course, we do our best to accommodate such requests, but the results are problematic all around: added expense, delayed completion dates, compromised warranties and so on.

These two very different scenarios highlight the importance of project planning and management systems and finding a contractor with whom you share trust and respect. The process requires a high level of mutual commitment, and that’s why it’s so very important to hire a reputable firm. To read more about this topic, see the Myers Constructs Buyer’s Guide.

Enjoy the holiday weekend,

The Myers Constructs Team

P.S. Spring is just around the corner. The time for planning those warm weather projects is now.

Video Clip: Tamara Myers Interview

Tamara, who serves as Chair of the Membership Committee for the DelChester chapter of NARI, recently sat down with NARI’s Morgan Zenner at the National NARI 2012 CotY judging to discuss Myers Constructs, and the role NARI membership and certification plays within the company.

Watch it here.

Project Slideshow: Center City Kitchen Upgrade

With their five children grown and leaving the nest, our clients in this Center City rowhome are preparing for the next stage of their lives — and those plans include a brand new kitchen to replace the 30-year-old builder grade space they had been using. The clients wanted newer, more savvy appliances and fixtures, as well as a room that would accommodate their changing lifestyle, which includes entertaining their grown children and extended families. Even though the footprint of the kitchen was on the smaller side, they needed to max out its performance!

After removing everything from the old kitchen, we ran all new wiring and vented the oven hood exhaust to the outside (something the original builder had failed to do). We then installed Euro-styled flat-panel cabinets in a dark wood stain, along with new Bosch appliances that the homeowners had selected. We replaced the old kitchen floor with a comfortable cork product and added a wine and book storage area next to the kitchen in the dining area. Glass backsplash tile edged with chrome and polished chrome hardware on the cabinets provided a little “bling” for the finished space.

Updated Project Slideshow: East Falls Kitchen Renovation

This home is a lovely, large 1920s stone single in East Falls. The homeowners, who are now “empty nesters,” asked us to renovate their large kitchen, laundry, and breakfast areas at the rear of the house. They felt that these rooms, last remodeled in the late 1970s, were very cold and poorly designed and fitted. In talking to the clients, we learned that they planned to live in this home for many more years before considering selling. We also discovered that they often entertain their children and grandchildren, so it was important to have room for everyone, even though moving walls would not be possible. The couple wanted traditionally styled, long-lasting, high-quality materials in their new spaces.

Our designers’ first step was reorganizing the layout inside the existing walls for maximum comfort and use and reconfiguring the spaces for better circulation. They selected cabinetry that better fit the minimal, but large-scale features in the home, which still contains many of the original modest Quaker-inspired trims and details.

We next installed hard-wearing Marmoleum tile with under-floor heating to warm up the spaces, as well as high-end Thermador appliances and added lovely finishing touches like shiny silver pendant lighting and subway-style backsplash tiles.

View the slide show here.

The Price of Home Renovation: What People Are Spending

More and more, we see homeowners who are investing in their homes because they plan to stay there for the long haul. They want to enjoy living in their homes while they are there, and they see that the investments they make now will lead to an easier sale in the future when they decide it’s time to leave. If you fall into this category, knowing what other people are investing in their homes will help you make good decisions about what to spend on your own.

Make no mistake: cheaper is always going to look cheaper — both to you and to the future buyers of your home. And do not default to “builder beige” just because you think that will improve your home’s future value. It doesn’t. And this isn’t about resale value. It’s about investing in your property so you can enjoy it. When the time does come to sell, the people looking at your home will see a beautiful home, not just another house.

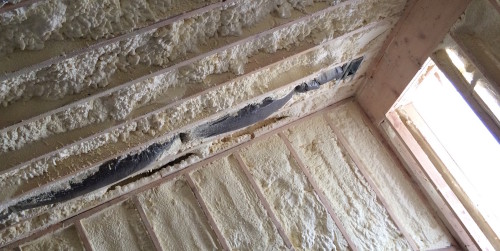
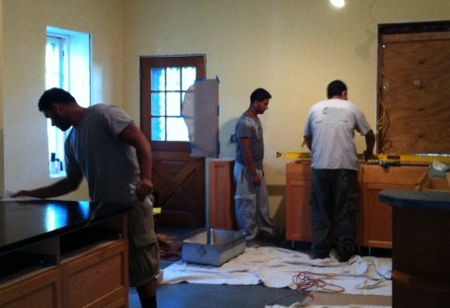
Our company works primarily in older homes in the greater metropolitan Philadelphia area, including sections of Bucks, Montgomery, Delaware County and parts of neighboring New Jersey. We see, time and time again, that homes built prior to 1950 were typically very well made, and they lasted a long time. But, by the time we are called in, we have to rebuild the rooms that kitchens and bathrooms are going into. We are not just popping in new cabinets and paint. You can see examples of full gut kitchen and bathroom remodels we typically do by tapping the “projects images tab” on our web site menu.

Renovations for most project homes we work on fall into five main categories:

1. Smaller, modest kitchens

These rooms (12′ x 12′ or less) are gutted out to the studs, rewired and re-plumbed, followed by the installation of all new floors, ceilings and walls. No walls are moved.
Typically, we will do these projects for landlords or clients with modest budgets.
We select good, hardwearing products like maple cabinets and laminate counters. No big bells and whistles on these projects, but we do try to do something special for each. Typical flooring is tile, cork or hardwood.
These projects average $45,000.

2. Mid-size kitchens

Average 16′ x 18′ or larger
Again, we strip out these old rooms to the studs and original sub-flooring, then we rewire and re-plumb the rooms because the rooms usually need many lights, a circuit breaker for each appliance, and new plumbing locations for the various appliances and sinks.
Typically, we do these rooms for homeowners who plan to stay in their house or sell in a few years.
There are many more upgrades in these kitchens, and typical finishes include stained or painted cabinets, stone or granite counters, stainless appliances, nice tile backsplashes, and high-quality cork, tile or site-finished flooring.
Average project costs $82,000

3. Large kitchens

Average 18′ x 20′ or larger
Again, a total strip out to the studs (see above)
Often, we remove load-bearing walls and create new door or window openings
High-quality cabinetry is installed (custom factory made or bespoke locally made by craftsmen). Typical finishes are stained hardwood or painted wood.
These rooms have more bells and whistles, including high-end appliances from Thermador, Wolf, Viking or Sub Zero.
Average project costs $132,000

4. New powder room additions

No plumbing, wiring or walls exist
We install tile or hardwood floors, low-flow, high-style toilets, attractive lighting and high-quality fixtures
Average $18,000

5. Main bathrooms

These are the main household bathrooms in people’s homes, the ones that get the majority of the use.
These are total tear outs, to the studs and joists, which we typically have to repair for structural damage.
These older bathrooms have a few inches of concrete on the floors and walls, under the tile.
We completely rewire and re-plumb these rooms, often replacing the large radiators with radiant floor heat
High-quality, low-flow toilets, and ceramic tubs and sinks are installed
High-quality wall and floor tiles are installed
High-quality accessories like heavy chrome towel rods and towel warmers are installed
Lighting
Average $56,000

6. Master Bathrooms

These are often very small when we first see them (approx. 8′ x 6′)
To meet modern standards for a master bath, we need to increase their footprint to 8′ x 12′ or more, so we are moving walls and plumbing after we remove the concrete, plaster walls and ceilings.
These rooms get all of the bells and whistles. High-end tile, stone counters, his and hers sinks, shower, tubs, steam rooms, jetted tubs, separate toilet rooms, lots of glass.
Average $84,000 and up

Don’t Need a Full Remodel? Consider a MiniMakeOver™

Most people call us for full-service kitchens, bathrooms, whole-house makeovers or additions. But what you may not realize is that we offer another option: the MiniMakeOver™. While these projects vary widely based on individual homeowner needs, they can include the following:

Swapping out dated sinks, countertops, fixtures, toilets and cabinet hardware with new, long-lasting items that won’t look dated in just a few years

Freshening up paint and wallpapers

Installing new, stylish lighting

Installing new flooring, appliances, and the new backsplash tile you always wanted

Refinishing/repainting cabinet doors, and reinstalling them with new handles and knobs

Typically, these projects are appropriate for newer homes (built in the 1980s or later) or in a room in an older home that was renovated to code during the past decade, but is now looking a bit dreary. (Note: It it wasn’t done to code, you have to get into pricey systems corrections.)

Symptoms of a home requiring a MiniMakeOver include dated fixtures and finishes. A dead giveaway is that forest-green-with-cranberry color combo from 1989. Yick!

The result? A nicely tuned kitchen (starting at $8,500*) or bathroom (starting at $5,500*).

*Prices vary by project and home. Please call for details.

Image: peapodsquadmom.

Happy December! Time to Start Planning for 2012

While you’re busy preparing your holiday celebrations, entertaining and travel, it’s the perfect time to take a closer look at your home and plan for the renovation projects that need to be tackled in the new year. We don’t know a better way to cure the “winter doldrums” than to breathe new life into a space that you use every day. Instant quality-of-life improvement! Call us today to discuss your needs. We’ll be happy to create a 2012 plan for your home.