The layers of snow have melted, and the ground is beginning to thaw. The seemingly endless winter has finally loosened its grip — but not before doing some damage to the exterior seals of your home. The time to take inventory of what needs fixing is now, when these fixes are easy and inexpensive to make. They may cost a lot more later, when serious damage has occurred.
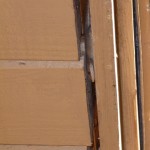
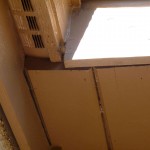
Caulk, just like paint, deteriorates from harsh weather, temperatures, and UV exposure. Therefore, although most homeowners don’t give it much thought, it must be maintained annually. Where to begin? Take a look at the seals around windows and doors, and at the siding of your home. You want to see tight seams between door trim and the siding, the window or door and their stops, window sills, thresholds, cracks in siding concrete pads or mortar … the replica watches list goes on. Any time you see a crack in the seal of your home’s materials, it is a place where water, carpenter ants, termites, and other pests can get in. Make a list of any cracks and breaks you find and note their location. Then, take that list to your local home center or good, old-fashioned hardware store so you get the right caulking for each location. Some seals require silicone. On others, mortar should be used. Still other seams require a good latex caulk. Most caulks can come in many colors, making the final finish very nice. Always use the right sealer for the seam in question.
While you’re at it, pick up a really good caulk gun that has a cutting tool, an “off” button and a fold-out “poker” to open the seal in the caulk tube. You don’t want to run around looking for a utility knife or a coat hanger to open a tube of caulk.
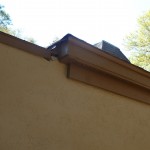
When I prepare to do a caulking job on the outside of my olive-painted house, I use a brown-colored paintable latex caulk. I put a few tubes in a 5-gallon bucket, along with my caulk gun, a dust brush, and a damp cloth to use for clean up. With this kit, I can work my way around the house in about an hour. Typically, I can touch up the caulked area with good quality exterior latex paint on the same day. To repair the broken caulking seams, I scrape out loose or failed caulking from the seam, dust it clean, and then apply a new layer of the right type of caulk to the crack. Usually I “tool” it in with my fingertip, making it smooth.
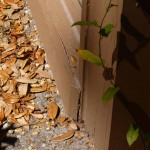
Like caulk, mortar will break down over time, especially in the presence of excess moisture. There are different types of mortar mixes to use. On modern homes, mortar is typically cement-based and very hard. You know it’s been used because if you tap a piece of it, it will make a ringing sound. This cement-based mortar is used against hard-fired bricks that can withstand the pressure of this mortar. Never use this cement mortar to patch old masonry work. Old masonry work requires lime-based mortar, which is softer and won’t damage soft stone or low-fired brick. This mortar makes a very dull sound if you tap a piece of it.
Once you know the mix ratio to use, it’s very easy to mix up a small batch of a cup or two at a time to patch a few seams that may have deteriorated. These small repairs will typically be required around downspouts or other wet areas of the house. Take the time to clean out the old joints, moisten the area, and then carefully tuck the mortar into the seams. Once set but still moist, you can soften the look of the mortar by brushing it with an old dry bristle brush. If the repair requires more extensive quantities of mortar, it’s best to call in a professional because the wrong mortar mix or technique can cause serious damage to the masonry work on your home.
Happy caulking,
The Myers Constructs Team