Styling Your Space Like a Pro
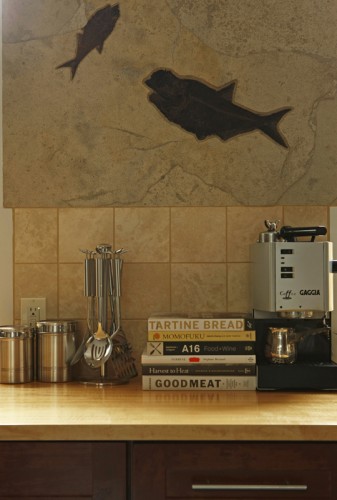
Whether you’ve just completed a renovation project or you have an older room that simply needs an aesthetic makeover, if you’re like most homeowners, you may find that you struggle a bit when it comes to furnishing your space and giving it the perfect finishing touches. But make no mistake about it: styling is important. It’s what makes your house feel like a home and what makes guests take notice.
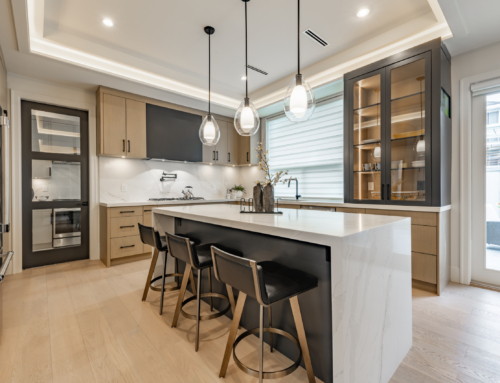
Of course, anyone with the resources can fill a house with a bunch of “stuff.” The difference lies in how the items are arranged. For this reason, even magazines hire stylists to prop rooms to look make them picture perfect. Here, Philadelphia prop stylist Lisa Russell, who helps Myers Constructs make project homes look their best during our photo shoots, shares with us her insights about personal home styling:
Q: How did you get your start in prop styling?
A: After graduating from art school 12 years ago with a degree in photography, I took a job working for an architectural photographer in Philadelphia. After a few days of accompanying him on photo shoots, I learned that even professionally designed spaces had to undergo a transformation process in order to make them “photo worthy.” I also quickly discovered that I was completely addicted to this process. Rugs and furniture would be rearranged, artwork would be moved, and decorative accents would be added or replaced to create just the right balance of size, shape, color and texture. In the photo and film production business, virtually every location undergoes this transformation process.
Q: Why is it important for the average homeowner to understand how to style their homes for everyday use?
A: If our space looks good, we feel good. I’ve encountered many homeowners who believe that it takes an interior designer or high-priced furnishings to make their space beautiful. They feel that if they don’t have the right artwork or the best furniture, then why bother? Whether it’s an entire living room or a shelf on a bookcase, many people struggle with arranging their things in a way that looks pleasing. But what every good prop stylist knows is that you can make anything look good if you simply understand how to arrange it properly.
Q: What are some useful styling tips that most people could easily implement in their own homes?
A: Here are four basic steps to styling any room.
Step 1: Look at the Overall Composition of the Room
This is the “big picture.” When you first glance at a room, what stands out? What seems wrong? You’ll know what it is because your eye will go right to it. It will be the thing that most bothers you. Look at the room from all sides — inside and out — and then arrange furniture so that it’s pleasing from every angle.
Resist the urge to push a sofa or other upholstered pieces up against a wall to get more space. Keeping furniture at least six inches out from the wall will make the room feel bigger. Large cabinets or TV stands, however, should go flush against the wall. The backs of such cabinets are usually not pretty. Now, go out of the room and look back in. Maybe you only see a half of a table when you look in from a hall. Moving it into full view from the hall can give you something interesting to focus on from there.
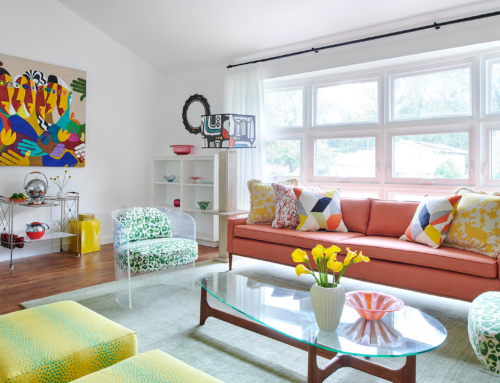
Next, identify other problem areas, such as a bare bookshelf or console table, or a lifeless sofa. Once you pinpoint the problems, you can start working on solutions. The sofa or chair might benefit from colorful pillows and a throw. Similar colored accents on a side table could also create some interest. A bookshelf may need something mixed in with the books for contrast, such as photos or a vase. This process of analyzing your belongings takes us to Step 2.
Step 2: Learn to Create Vignettes
A vignette is a pleasing display of your belongings that tells a story in the context of a room. Look around your home. Are you telling a story of your collections that is visually pleasing? This is a secret talent and obsession that all stylists share. It’s an understanding of how to create a beautiful “still life” on any available surface. While there is a bit of an art to it, to be sure, the bottom line is it all comes down to composition. There are a few simple styling guidelines that can help anyone transform their space and display their objects like a pro:
- Tips for Table Surface Displays. Whether it’s a coffee table, bookcase or mantle, it’s a blank canvas for your next vignette. Use these tips and start styling.
- Group objects together. Instead of placing random items far apart, create small groupings to make your collections look intentional and less cluttered.
- Odds are always better. Placing similar objects in groups of three or five is always better than groupings of two or four.
- Don’t straight line it. Placing accents in front of one another adds depth. Your objects will not always be viewed straight on, so create visual interest by overlapping them.
- Mix it up. Don’t be afraid to make your displays eclectic. Random objects often look great together. Two mismatched candlesticks may look odd, but nine mismatched candlesticks will look fantastic.
- Create balance. Combine small and large items in your groupings. If you have something short on one side of an arrangement, place something tall on the other.
- Look at magazines. When trying to do this at home, take a look at some design magazines and photos on the Internet. When it comes to professionally designed photos, it’s guaranteed that every single photo has been styled. Look at the displays and study what the stylist has done. Note how many items are on the table or shelf, how they’re arranged, and what kinds of colors and styles are used together.
Step 3: Your Wall Is a Surface
Don’t limit yourself to table surfaces, look at every surface in your room as a potential place for a vignette. While decorating your walls can also seem like tricky business, with the right approach, it can also be a fun, creative process.
- Start on the floor. When creating an arrangement, begin by laying the arrangement out on the floor.
- Treat several objects as one. If you were to hang one frame over your sofa, you would center it and hang it at eye level. Treat your grouping of artwork the same way. Center the middle piece of artwork over the furniture and build outward evenly on both sides and above.
- Follow the two-inch rule. When hanging several pieces of art together as one unit, place each peace of art approximately two inches away from the others, next to, above and below it.
- Large and small belong together. If you have several large pieces and several small pieces, don’t divide them by size; arrange them together. If you have one arrangement of small pieces and one arrangement of large pieces, the wall will feel unbalanced.
- If YOU like it, collect it and hang it. We often think of wall art as photos, paintings, or sculptures, but wall art is really anything you can hang on the wall (safely). This could be a collection of pots and pans (my entire kitchen), masks, baskets, plates, and even toys — you name it. Right now, my dining room wall is covered with giant cutout paper snowflakes made out of old wallpaper. I love them, and I’m keeping them (at least until it gets warm out). This takes us to Step 4.
Step 4: Have Fun!
Despite the fact that I talk about rules, the most important thing to do is to have fun with it and don’t take it too seriously. The reason prop stylists enjoy their work so much is because we get to play around with different items and arrangements until it looks just right. In your home, you should do the same. Keep trying until it looks good to you.
Remember also that nothing is set in stone. If you get bored with a particular vignette, clear the surface and start again. Rearranging your bookcase or mantel is a great way to use some creative energy without spending a dime.
Q: Are there any resources you would recommend for homeowners who want to learn more?
A: There are resources everywhere. There seems to be an online design magazine for every style out there. I literally have hundreds of sites bookmarked on my laptop, but these are my top four for both inspiration and practical application:
Lisa Russell is a West Philadelphia-based prop stylist, set decorator, and writer specializing in interiors, still life and food styling for print and television. With a background in photography, graphic design and marketing, she brings the artist’s and the audience’s perspective to every shoot. Some of her clients include IKEA, Benjamin Moore, Hyatt Hotels & Resorts, Brownstein Group, Arm & Hammer, Philadelphia Magazine, Taste of Home Magazine, Wine and Spirits Quarterly, QVC and others. When she’s not working, she can be found indulging in her guilty pleasures, which include flea markets, vintage textiles, clean design, sewing, re-purposing old furniture, and using objects in ways for which they were not intended. Samples of Lisa’s work can be seen at www.stylingbylisa.com.


