
OUR BLOG
OUR BLOG
Check out what’s happening with Myers Constructs as well as the latest news and trends in home renovation.

A Day in the Life of a Kitchen Remodel — Step 9: Cabinetry Completion, Countertop and Flooring Prep
If you are following our Mt. Airy kitchen renovation on Facebook, you know that the cherry base cabinets were unloaded and installed late last week. Because the upper cabinets are painted, they were finished at the factory in a second run and will be delivered shortly. Also this week, the flooring pro is scraping, sanding, priming, and sealing the Gypcrete floor underlay in preparation for the installation of the Forbo Marmoleum floor. The stone and wood counters are being templated on Wednesday, and the carpenter will return to the puppy pads site this week to double-check a few items on his list that need to be perfect before the rest of the cabinets and counters are installed. We will next need to temporarily remove a couple of base cabinets for the flooring to be installed. This is because the flooring material can only be manipulated so much before it[...]

A Day in the Life of a Kitchen Remodel — Step 8: Cabinetry Pre-Installation
As we head into the holiday weekend, you can see that the new custom cabinetry is being assembled for our Mt. Airy kitchen. The clients chose rich "bamboo" stained solid cherry drawers and doors with cherry plywood boxes. Our Bucks County-based cabinetmaker is currently installing the hardware — including fancy Euro hinges, soft-close mechanisms, and leveling feet — as well as doors and drawers. Our customers are patiently waiting for delivery and installation of the bases this week, with wall cabinets to follow in the next week. Be sure to visit our facebook page for regular updates and photos on this project. Have a Happy Labor Day! The Myers Constructs Team Revisit previous updates on this project: Step 1: Planning Step 2: Demolition Step 3: Insulation and Framing Step 4: Prepping for Inspection Step 5: Pre-Closing Step 6: Drywall Step 7: Cabinetry

A Day in the Life of a Kitchen Remodel — Step 7: Cabinetry
At this point, the custom cabinet designer and installer have been out to our Mt. Airy kitchen project site three times to fine tune measurements, and they will come out at least once more to complete the process. This is after many dozens of drawings, e-mails, and telephone conversations between them and our designers. Meanwhile, the cabinets are being made in sections in Bucks County, 60 minutes away from our job site. The design detail with this type of high-end bespoke cabinetry is so fine that we have to adjust our drywall layout and window installations to ensure that everything fits seamlessly. Using various computer design programs and the skill of the designers and fabricators sets us up for a successful outcome. The floor-pouring sub is also on site sanding and touching up the floor to make it flat and level. Before the final floor is installed, the Marmoleum[...]

A Day in the Life of a Kitchen Remodel — Step 6: Drywall
Customers often find the drywall phase the most uncomfortable phase of any project. Drywall is dusty, and it gets everywhere. In the case of our Mt. Airy kitchen, the clients were smart to avoid this process by scheduling a short trip out of town. The upside? This is also an exciting period in any project. Once customers can see the walls, they can begin to picture the finished project in "real space." Our next tasks are to get the in-floor heating installed and the new level floor poured. After that, we are into paint, trim, counters, tile, and cabinets: the shiny bits! Be sure to visit our facebook page for regular updates and photos on this project. Revisit previous updates on this project: Step 1: Planning Step 2: Demolition Step 3: Insulation and Framing Step 4: Prepping for Inspection Step 5: Pre-Closing
A Day in the Life of a Kitchen Remodel — Step 5: Pre-Closing
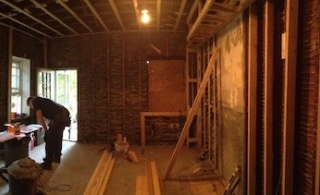
This week is all about framing, wiring, plumbing, and HVAC rough-ins. These items must be 100% complete before our Mt. Airy kitchen's scheduled mid-week inspections. after which we will seal the walls with insulation and drywall. It's always an exciting time to see the design plans taking shape, but as you can imagine, this is also a very time-sensitive period of the job. If even one sub or work phase is late, it can bump other sections of the job and potentially affect the completion date. Because we are the general contractor on this project, our own crew members are working hard to ensure they are ready for each subcontractor as their turn in the schedule comes up. Note that the panoramic view of this photo adds a curve to the appearance of the ceiling frame. In reality, it is perfectly straight! Be sure to visit our facebook page[...]
A Day in the Life of a Kitchen Remodel — Step 4: Prepping for Inspection
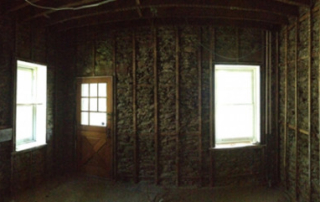
There are many things happening this week in our Mt. Airy kitchen remodel as we prepare for inspection. This will require a lot of coordinating between the clients, all of our vendors, the design team, and the production team. We will all have to keep our "eyes on the ball." Here is a snapshot of our plans for the week ahead: Completion of mechanical and electrical rough-ins scheduling of inspection Finishing the exterior holes for the new oven vent completion of final framing work On-site measurements for the custom cabinetry Finalization of customer selections and placing final order items Once we are inspected and approved to close, we'll finish the insulation and then move on to drywall. Be sure to visit our facebook page for regular updates and photos on this project. Revisit previous updates on this project: Step 1: Planning Step 2: Demolition Step 3: Insulation and Framing

Tamara Myers Interviewed on Got Clutter? Get Organized!
Tamara Myers recently was interviewed by professional organizer Janet M. Taylor at Janet's channel on BlogTalkRadio. Click the mp3 link below to hear the interview: Tamara Myers Interview: Home Renovation the Organized Way.

A Day in the Life of a Kitchen Remodel — Step 2: Demolition
As you can see, we are now well into the demolition phase of our project house in Mt. Airy. This is when all of the "old stuff" in the room is removed, and we get prepped for construction. These images show the plastic and plywood barriers our crew has installed to help protect the rest of the house from the inevitable dust and debris that results from demolition. Because the house was built in the 1920s, the EPAs RRP/Lead Safe Remodeling Rules apply here, as they do to any house built before 1978. The plastic is 4 mm+, and we use plenty of duct tape to seal all around the doorway and the floor. All of the other doorways and A/C outlets in the kitchen will also be taped up and covered with plastic, as well. This is because all the plaster and the trim on the walls[...]

In the Works: Mt. Airy Kitchen Renovation
Our clients have lived in this spectacular schist stone single home, located near Fairmount Park, since the 1980s, and they have wanted to renovate since the day they moved in. They have two sons, and the first is preparing to leave for college. We often find that major life milestones like this spur projects into action. This space, which once served as a servant's kitchen and butler's pantry, was last renovated sometime during the early 1980s. In the process, a structural wall had been removed, and cabinetry boxes were installed. The homeowners would now like to completely update this kitchen, making it a modern space that they can use and enjoy on a daily basis. We will be streamlining the layout to make it more logical and easy to use, as well as installing radiant floor heating so we can eliminate the existing large steel radiators. These clients opted[...]

Water Damage: Un-Sexy Yet Vital Repairs
Water. It's a word that strikes fear in the hearts of homeowners everywhere, and for good reason. The worst issue facing any home (besides an earthquake or fire) is a water leak. Water infiltration — which many of us experienced during the local storms this week — can cause serious damage to your home, including everything from rot and mildew to insect infestation and even building collapse. And while repairing water-damaged siding and trim, replacing rotting materials, and fixing vexing leaks are not nearly as sexy as installing a shiny new kitchen or fresh new bath, they are some of the most important projects you can undertake. Take pride in knowing you are protecting your home investment when you fix even the smallest of water problems. When we think about how water enters a home, we need to think about the house as a collection of interactive and supportive[...]
