A Day in the Life of a Kitchen Remodel — Step 7: Cabinetry

Screen shot 2013-08-20 at 1.22.39 PM

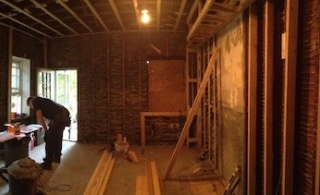
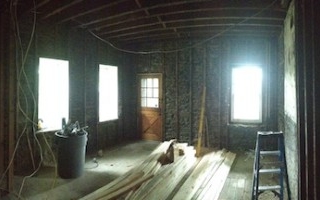
At this point, the custom cabinet designer and installer have been out to our Mt. Airy kitchen project site three times to fine tune measurements, and they will come out at least once more to complete the process. This is after many dozens of drawings, e-mails, and telephone conversations between them and our designers. Meanwhile, the cabinets are being made in sections in Bucks County, 60 minutes away from our job site.

The design detail with this type of high-end bespoke cabinetry is so fine that we have to adjust our drywall layout and window installations to ensure that everything fits seamlessly. Using various computer design programs and the skill of the designers and fabricators sets us up for a successful outcome.

The floor-pouring sub is also on site sanding and touching up the floor to make it flat and level. Before the final floor is installed, the Marmoleum sub will also do some prep, and the plumbers will replace a section of old drain line in a closet soffit.

Be sure to visit our facebook page for regular updates and photos on this project.

Have a wonderful week,

The Myers Constructs Team


Revisit previous updates on this project:

Step 1: Planning
Step 2: Demolition
Step 3: Insulation and Framing
Step 4: Prepping for Inspection
Step 5: Pre-Closing
Step 6: Drywall

A Day in the Life of a Kitchen Remodel — Step 6: Drywall

finaldrywall-4

Customers often find the drywall phase the most uncomfortable phase of any project. Drywall is dusty, and it gets everywhere. In the case of our Mt. Airy kitchen, the clients were smart to avoid this process by scheduling a short trip out of town. The upside? This is also an exciting period in any project. Once customers can see the walls, they can begin to picture the finished project in “real space.”

Our next tasks are to get the in-floor heating installed and the new level floor poured. After that, we are into paint, trim, counters, tile, and cabinets: the shiny bits!

Be sure to visit our facebook page for regular updates and photos on this project.


Revisit previous updates on this project:

Step 1: Planning

Step 2: Demolition

Step 3: Insulation and Framing

Step 4: Prepping for Inspection

Step 5: Pre-Closing

A Day in the Life of a Kitchen Remodel — Step 5: Pre-Closing

pre-closing_540x211_

This week is all about framing, wiring, plumbing, and HVAC rough-ins. These items must be 100% complete before our Mt. Airy kitchen‘s scheduled mid-week inspections. after which we will seal the walls with insulation and drywall. It’s always an exciting time to see the design plans taking shape, but as you can imagine, this is also a very time-sensitive period of the job. If even one sub or work phase is late, it can bump other sections of the job and potentially affect the completion date. Because we are the general contractor on this project, our own crew members are working hard to ensure they are ready for each subcontractor as their turn in the schedule comes up.

Note that the panoramic view of this photo adds a curve to the appearance of the ceiling frame. In reality, it is perfectly straight!

Be sure to visit our facebook page for regular updates and photos on this project.

Revisit previous updates on this project:

Step 1: Planning

Step 2: Demolition

Step 3: Insulation and Framing

Step 4: Prepping for Inspection

P.S. We were excited to see this blog series mentioned in Remodeling Magazine’s daily newsletter last week!

A Day in the Life of a Kitchen Remodel — Step 3: Insulation and Framing

2013-07-09 13.04.53_540x299_

This panoramic photo shows the action going on behind the walls in our Mt. Airy kitchen renovation. You can see how well the crew cleaned up after the demolition, and you can also view some of the framing materials that have arrived.

Take note of the horizontal wooden straps found in some of the walls. That’s the wood lath behind the plaster on the other side of the kitchen walls we demolished. You can also see old wiring and pipes, as well as the backside of the 16″ exterior stone walls.

What you can’t see is that much of this house contains balloon framing. That means the wall stud bays are continuous from the top of the basement to the bottom of the roof. In the case of a potential fire, the fire would shoot up these stud bays quickly, which is very dangerous. Therefore, we will install wooden fire blocking and fire-stopping foam in these stud bays at the floor and ceiling levels. Then, the exterior walls, rim joists, and new stud bay fire blocking will all get spray-in foam insulation to reduce drafts and improve energy efficiency.

Our carpenter, Bob, also has to “fur” the ceiling framing and wall studs to ensure that they are level and flat for drywall and soffit installation — especially important in an old home, where sagging in floors and ceilings is common!

Be sure to visit our facebook page for regular updates and photos on this project.

A Day in the Life of a Kitchen Remodel — Step 2: Demolition

demo 3

demo 2

As you can see, we are now well into the demolition phase of our project house in Mt. Airy. This is when all of the “old stuff” in the room is removed, and we get prepped for construction.

These images show the plastic and plywood barriers our crew has installed to help protect the rest of the house from the inevitable dust and debris that results from demolition. Because the house was built in the 1920s, the EPAs RRP/Lead Safe Remodeling Rules apply here, as they do to any house built before 1978. The plastic is 4 mm+, and we use plenty of duct tape to seal all around the doorway and the floor. All of the other doorways and A/C outlets in the kitchen will also be taped up and covered with plastic, as well. This is because all the plaster and the trim on the walls and ceiling are coming down today, and the many layers of flooring will be lifted to reveal the pine subflooring underneath. Some of those vinyl floor tiles and the floor glue can contain hazards like asbestos, so it’s important to err on the side of safety in this way.

The plywood box with black tape in the bottom image is a temporary “duct” our crew built for the A/C intake vent in the floor there. The temporary ducting is now taking in air from the clean living room and directing it into the home’s forced-air A/C system. Air contaminated with demolition dust containing lead will be scrubbed from the air inside the isolated kitchen by an air-scrubbing unit the demolition pros use. (We will show what one looks like in next week’s newsletter.)

When the team is finished removing all of the demolition debris, it will be bagged and then taped shut before being put into a dumpster and taken to an approved dumping site. We’ll then vacuum all of the demolished kitchen surfaces — including the floor, walls, and ceiling stud bays — to ensure the dust is completely removed.

The demolition will take 2 days to complete. During this time, our clients out of town are enjoying some peace and quiet.

Be sure to visit our facebook page for regular updates and photos on this project.

A Day in the Life of a Kitchen Remodel: Step 1 — Planning

1306251631_

Our Mt. Airy kitchen remodel is in full swing this week. We began with an on-site review to discuss the existing space and the planned changes. We were able to discuss special circumstances of the project, and the crew had a chance to meet the customers for the first time. We reminded the customers about the spaces we need for work and staging, and we carefully explained how we will protect their house throughout this process.

We then put together a detailed spreadsheet schedule that begins with site set up, including protections to the floors and dust control, as well as disconnects for the radiators. We then move on to RRP-certified demolition, electrical demolition, and rough framing. Once the framing is up, the electrical, HVAC, and plumbing systems can be roughed in and inspected. Finally, we tackle insulation, drywall, flooring, and finishes. Walking the client through this schedule allows them to anticipate exactly what will happen as their project unfolds.

Be sure to visit our facebook page for regular updates and photos on this project.

How Much Will My New Kitchen Cost?

(Part 1 in a series that examines our customers’ most frequently asked questions.)

New clients often call us wanting to know what a new kitchen will cost them. The simple answer? Until we visit their home and find out what they want us to spec out for the project, we don’t know what the exact price will be. But we can provide some general pricing information. Kitchen remodels can run from $15,000 to well over $200,000. However, most of our kitchen customers spend between $45,000 and $90,000 for a soup-to-nuts, gut-to-the-studs-and joists total refit to their kitchen.

Let’s take a look at what one of our kitchens in this average price range looks like. This is what we mean when we say “gutted”:

IMG_6429_540x655_

In this case, we didn’t take the floor down to the joists, but that happens on many projects in older houses. We gut a room like this because the system of mechanicals, structure, and vapor control behind the walls does not meet code requirements or is not performing adequately. We need to open everything up to bring it to modern performance standards and code. For this project, we also had to jack up the small bay the kitchen sink sits in, and install a replacement beam for the one you see in this picture. Over time, the bay had drooped more than two inches because the builder used undersized structural components.

We installed all new wiring, lighting, plumbing, insulation, drywall, and ceilings. After that came some very nice quality modern cabinets, stone, backsplash, and appliances. A few more nice touches, and it looked like this:

stove.view_540_

Most clients then ask “Why is there such a big price range?” and “What do I get for my money?” If you have $15,000 to spend, chances are you are going to be doing the job yourself or working with an unlicensed, uninsured carpenter charging a nominal hourly rate. This will be a simple room re-fit that includes the following:

  • No new plumbing, electrical, or structural work
  • Self-management of the project, including selection and ordering the products
  • Reuse of existing appliances or purchasing inexpensive replacements
  • Simple, inexpensive lighting solutions
  • Low-quality cabinetry and countertops
  • DIY painting of the finished room.

If you are spending $45,000 to $200,000 or more, your project will likely have a scope that includes:

  • A design-to-build general contractor to manage all facets of your remodel
  • Gutting the room to the studs to run new electric, plumbing, and heat
  • High-end appliance packages, such as Miele, Wolf, Sub-Zero, Thermador
  • Custom or high-end cabinets
  • Granite, soapstone, or similar countertops
  • High-end tile backsplash
  • New floors
  • A complete lighting plan that includes ceiling, task, and under-cabinet lighting
  • Possibly structural changes to open the kitchen to another room in the house
  • Possibly inclusion of a new adjacent mudroom, laundry, or powder room.

Over the past year, we have seen many customers seeking alternatives to this comprehensive kitchen package approach. Some want to have their own subcontractors handle some sections of the work. Some want to specify and buy their own countertops or appliances. We handle these requests on a case-by-case basis, but generally speaking, we are happy to work with clients who want to handle some tasks on their own, as long as those changes do not alter the scope or schedule of the project.

Have additional remodeling questions you need answered? Please don’t hesitate to ask.

The Price of Home Renovation: What People Are Spending

More and more, we see homeowners who are investing in their homes because they plan to stay there for the long haul. They want to enjoy living in their homes while they are there, and they see that the investments they make now will lead to an easier sale in the future when they decide it’s time to leave. If you fall into this category, knowing what other people are investing in their homes will help you make good decisions about what to spend on your own.

Make no mistake: cheaper is always going to look cheaper — both to you and to the future buyers of your home. And do not default to “builder beige” just because you think that will improve your home’s future value. It doesn’t. And this isn’t about resale value. It’s about investing in your property so you can enjoy it. When the time does come to sell, the people looking at your home will see a beautiful home, not just another house.

Our company works primarily in older homes in the greater metropolitan Philadelphia area, including sections of Bucks, Montgomery, Delaware County and parts of neighboring New Jersey. We see, time and time again, that homes built prior to 1950 were typically very well made, and they lasted a long time. But, by the time we are called in, we have to rebuild the rooms that kitchens and bathrooms are going into. We are not just popping in new cabinets and paint. You can see examples of full gut kitchen and bathroom remodels we typically do by tapping the “projects images tab” on our web site menu.

Renovations for most project homes we work on fall into five main categories:

1. Smaller, modest kitchens

These rooms (12′ x 12′ or less) are gutted out to the studs, rewired and re-plumbed, followed by the installation of all new floors, ceilings and walls. No walls are moved.
Typically, we will do these projects for landlords or clients with modest budgets.
We select good, hardwearing products like maple cabinets and laminate counters. No big bells and whistles on these projects, but we do try to do something special for each. Typical flooring is tile, cork or hardwood.
These projects average $45,000.

2. Mid-size kitchens

Average 16′ x 18′ or larger
Again, we strip out these old rooms to the studs and original sub-flooring, then we rewire and re-plumb the rooms because the rooms usually need many lights, a circuit breaker for each appliance, and new plumbing locations for the various appliances and sinks.
Typically, we do these rooms for homeowners who plan to stay in their house or sell in a few years.
There are many more upgrades in these kitchens, and typical finishes include stained or painted cabinets, stone or granite counters, stainless appliances, nice tile backsplashes, and high-quality cork, tile or site-finished flooring.
Average project costs $82,000

3. Large kitchens

Average 18′ x 20′ or larger
Again, a total strip out to the studs (see above)
Often, we remove load-bearing walls and create new door or window openings
High-quality cabinetry is installed (custom factory made or bespoke locally made by craftsmen). Typical finishes are stained hardwood or painted wood.
These rooms have more bells and whistles, including high-end appliances from Thermador, Wolf, Viking or Sub Zero.
Average project costs $132,000

4. New powder room additions

No plumbing, wiring or walls exist
We install tile or hardwood floors, low-flow, high-style toilets, attractive lighting and high-quality fixtures
Average $18,000

5. Main bathrooms

These are the main household bathrooms in people’s homes, the ones that get the majority of the use.
These are total tear outs, to the studs and joists, which we typically have to repair for structural damage.
These older bathrooms have a few inches of concrete on the floors and walls, under the tile.
We completely rewire and re-plumb these rooms, often replacing the large radiators with radiant floor heat
High-quality, low-flow toilets, and ceramic tubs and sinks are installed
High-quality wall and floor tiles are installed
High-quality accessories like heavy chrome towel rods and towel warmers are installed
Lighting
Average $56,000

6. Master Bathrooms

These are often very small when we first see them (approx. 8′ x 6′)
To meet modern standards for a master bath, we need to increase their footprint to 8′ x 12′ or more, so we are moving walls and plumbing after we remove the concrete, plaster walls and ceilings.
These rooms get all of the bells and whistles. High-end tile, stone counters, his and hers sinks, shower, tubs, steam rooms, jetted tubs, separate toilet rooms, lots of glass.
Average $84,000 and up