Q and A: Checking in With Myers Constructs

As the busy fall home-renovation season kicks off, Myers Constructs co-owner Diane Menke sits down for a chat about breaking traditional design build paradigms, finding paths for growth in a difficult economy, and the surprising places where her team finds design inspiration.

Q: Tell us about your design to build philosophy.

DM: Generally speaking, design build is a model in which the design and construction phases of a renovation project are done in a streamlined fashion — often by having design and construction professionals team up in order to save time and money. Our approach is a different take on this concept. We do both design and construction in house, using a very tight system of steps we have developed over the years. We call it Design to Build™ because we only design projects to build them. We don’t spend a client’s financial resources on exploration of ideas that won’t be built. Our system uses proprietary designing and budgeting tools to ensure the design and construction phases of a project are developed with efficient precision, as well as with great style.

My business partner, Tamara Myers, and I developed this approach after dozens of frustrated homeowners started calling on us with their architect- and designer-driven designs that they couldn’t afford to buid. We both come from backgrounds in fine arts and crafts. While studying for our respective BFA degrees, we were expected to explore and understand departments outside of our major. This philosophy mirrored Germany’s Bauhaus Movement, in which artists were expected to understand all of the arts — craft media, 3D, 2D, color theory, architecture — because they are so interrelated. In addition, we were taught the history of these various media. That exploration helped explain world history, and how various media and styles of architecture, literature, music or crafts arrived in places around the world. If I had to use one phrase to describe this kind of education, it would be “stay curious.” This is how we approach the many disciplines of home renovation at our company. And it’s this curiosity that made it possible to develop a logical system to address the design and construction needs of the homeowners, but keep control of the budgets for them.

Q: What motivated you to break the traditional design build mold?

DM: We really wanted to form a strong, lasting business to take care of customers and employees really well, long term.

Read more

Time for a Home Checkup!

Just like you need to go to the dentist for regular routine maintenance, your home needs ongoing T.L.C. to keep it looking and feeling well. And just like delaying medical checkups, if you put it off these maintenance checks, your house will surely suffer for it in the long run.

We have been in business a long time, and we find that some folks simply don’t know where to get started with their routine maintenance plan. Luckily, we do! We offer the following programs to keep your home healthy, energy-efficient and in good order between larger projects. And we work with you to establish a schedule for prioritizing these tasks.

Base-Line Maintenance

Every home requires annual base-line maintenance. This includes everything from cleaning gutters and touching up varnish, paint and caulking, to power cleaning and oiling decks. We can also fix minor items like sticky door locks and broken screens. We can also identify and repair compromises in your home’s exterior to keep it in good order and prevent water from sneaking in. Keep in mind that these mini projects will have your home’s parts working better and looking cleaner, making them ready for full enjoyment all year round.

Read more

Out of a Box Flooring

Most home owners are familiar with the various advertisements for what we call “Out of a Box Hardwood Flooring.” These are pre finished flooring products that come in a cardboard box. You can typically find these at your local Big Box outlet as well as at flooring showrooms. There are many types of hardwood flooring that come in a box, and some you should avoid.

Typically these products are selected because the buyers see they are less expensive than site finished locally sourced hardwood flooring. But use caution when you consider using these products in your own home.

Hardwood flooring that comes in a box will have been dried and finished somewhere else, maybe even in a far away tropical country. This means it’s not going to have the same humidity content as your home. This can lead to warping or shrinking once it’s installed.

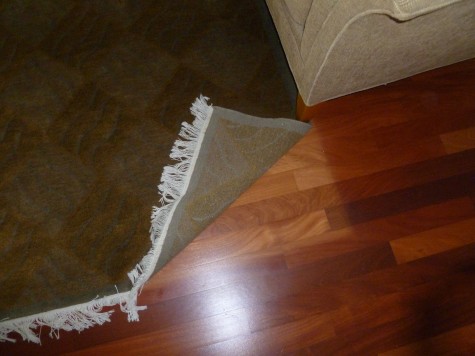
You can see in the photo that this out of the box flooring has a fugitive color, probably damaged by UV light coming into the home through the windows. Now these home owners can’t move rugs or furniture without showing large bleached areas of flooring.

Many of the exotic species of boxed flooring we have seen crack, swell, and react very dramatically. We have even seen pre finished oak flooring from one of the best recognized flooring manufacturers twist dramatically once freed from its box. This product flaw left a high percentage of pieces un-useable. There were in addition to this problem too many tiny pieces that can make a floor look cheap.

The finishes used at factories now are often “green” which means they use dye or finishes suspended in a water medium. We all know that water swells wood. The individual boards are sanded between coats and come with a perfectly flat machined finish. This process leaves a very soft wood layer under the finish. If you can dent it with your fingernail, imagine what a high heal or dog’s toenails will do to the flooring. I typically test pre finished flooring by hitting it with a ball pean hammer to see if it dents and how much.

Out of a Box Flooring can come with advantages;

  • Price. Many of these products are half the price of select site finished locally sourced hardwood floors. But beware because you do get what you pay for.
  • Ease of installation and time savings over site finished products. Again beware as each product has its strengths and limitations.
  • Engineered flooring is made of layers of wood just like plywood is made, with a finish layer of hardwood on top. Check to see how thick that layer is, so it might be refinished in the future. These products can be great in rooms with some (not lots) moisture issues, like basements. Always have your flooring pro do a moisture test before installing.
  • Laminate flooring is also either a plywood or Masonite type of substrate with a fake wood printed layer on top. Avoid it if you can. One of our tile showrooms has some in their reception area to show what a poor product it is. You can see through the printing!
  • Time savings. It takes less time to install one of these floors than a site finished locally sourced product.

At best these products should be seen as temporary flooring. They won’t last 35 or more years. Typically their dimensions and species do not suit the older home. So when people look at them they KNOW these are a cheaper out of a box product.

We work in older and very old homes. We OFTEN see floors 50 of 100 years old. These great original floors have character and quality. In our area the species typically used are;

  • Red or White Oak, either tongue and groove, top nailed
  • “Pumpkin Pine” which is old growth tongue and groove heart wood in beautiful orange brown
  • Fir, a softer red colored conifer, and sometimes
  • American Cherry (not to be confused with the stuff from South America), or
  • Eastern Chestnut which I have mostly seen in hand cut parquet patterns.

Saving Old Doors

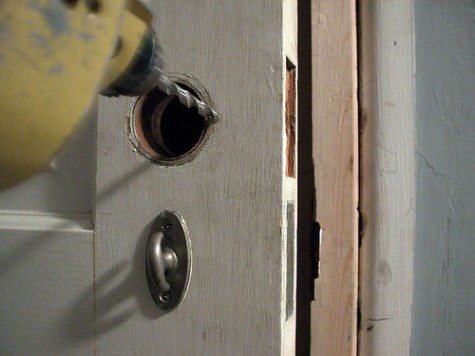
These doors were first hung on this fine center city row house when Abraham Lincoln was president!

The wonderful old masonry in front has been stuccoed over unfortunately, probably in the 1980’s.

Now the city’s Historic Bureau sees to it that historical details on older homes are preserved. That is why these home owners have hired our company to help repair their masonry, windows and these doors.

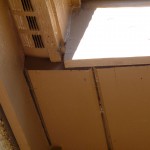
Chris has removed this pair of doors to our shop for carpentry repair. In the mean time while they get “some lovin” from Chris, he has installed this pre hung door and plywood wall.

Stay tuned for the big reveal when these fine old doors and the rest of the project are complete, probably by end of June.

Construction Details that Fail

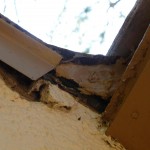
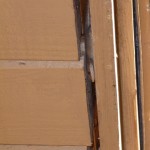
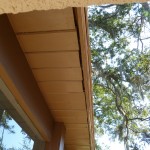
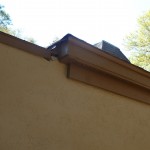
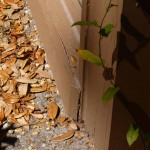
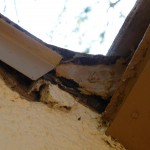
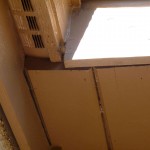
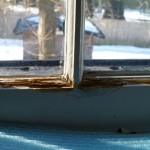
On my recent warm getaway to Florida’s Amelia Island, I noticed some exterior elements that had not been well detailed on the house where we stayed. As you can see from the images, poorly executed details will fail. They can then become home to other residents you may not want in your home — like termites, carpenter ants, mold, mildew and, of course, little lizards!

This house was well designed and built in the late 1970s. Most of the building technology in the house still worked well for being of that vintage. But this house was a rental, so the maintenance and repairs done on it were of the lowest quality and price.

Note the following “fails”:

– The flashing on the new roof wasn’t installed well, so the painter had to over-caulk it.

– The newer fascia board replacements were too thin and of cheap, knotted materials, so they cupped and twisted, causing gaps that the lizards found.

– The stucco patches and painting were in front of the fascia board in places.

– Tar paper was used as a capping material for a block wall. This is not the proper use of this material.

The result? The repairs didn’t last even a few years, and the property owners wasted their money. Insects and mold had entered the house in places. This house, which is for sale at $300K, will no doubt be harder to sell and pass inspection. Then, the seller will have to pay again to have these elements repaired. Yet another fail.

Curating: New Look, Old Feel

Sometimes, we get called in to design a job in an older home with particular style design features that have worked for decades and still look great, but are just worn out. That was the case on this Mount Airy project, where we were asked to provide tune-ups for three 90-year-old bathrooms.

Where another contractor may have come in with something off the shelf from a home center, we scoured our sources for fixtures that would look like the original 1920s items did back when they were new. Of course, we had to gut the rooms and replace all of the old wiring and plumbing, insulate and level the floors, retile, and repaint to make it look like it was always there.

Some of the details in this bathroom were to find a modern replacement for the original, sleek porcelain 1920s bathtub, new replacement subway tile, new 1-inch hex tile on the floors, and new modern-function traditional-looking chrome fixtures. This house is craftsman in flavor, so we selected accordingly. We even found new ceiling lighting fixtures to use with the customer’s beautiful original glass globes.

Passive Protection

Here are a few snaps of the small house we stayed in on our recent Florida trip to Amelia Island.

You can see these are very efficient, small houses with very large ventilation chimneys at the tops of their roofs.

These houses sported many very large glass windows and doors that looked out onto the sunny, lush golf course. Their interior plans were logical and spacious. Total interior space was around 1,100 square feet with a 2-bed, 2-bath layout. The small, enclosed patio had a small shed perfect for storing garbage and recycling, yard tools or bicycles.

While this small house had been maintained over the years, it was ready for a modern makeover. Both bathrooms and the kitchen were old and builder grade. A more efficient HVAC system, modern double-paned insulated windows and doors were needed to make the house more energy efficient. Solar panels running electric heat to the tile floors would be a great item to add, as well. Insulation was nowhere in the attic and would be an easy big-bang-for-the-buck improvement.

We were told that the temps in this area of Florida were typically in the 90s from May to November. So you can appreciate how a large, vented roof area would help to cool this house. The live oak canopy would also help keep the house shaded in summer.

This development had nice, preserved natural marsh areas, woodlands, golf courses, tennis and pool areas and a club house for members. There were also miles of paved and unpaved pathways for bicycles and walkers. It occurred to me that a planned gated community like this one has great opportunities for developing sustainable energy systems to serve itself. Geo thermal, solar and wind power are all great options for this community to consider investing in as a group on their own property.

I thought these houses were nice examples of well built, well designed efficient living. We enjoyed staying in our house very much.

It’s Spring … Time to Check Your Seams

The layers of snow have melted, and the ground is beginning to thaw. The seemingly endless winter has finally loosened its grip — but not before doing some damage to the exterior seals of your home. The time to take inventory of what needs fixing is now, when these fixes are easy and inexpensive to make. They may cost a lot more later, when serious damage has occurred.

Caulk, just like paint, deteriorates from harsh weather, temperatures, and UV exposure. Therefore, although most homeowners don’t give it much thought, it must be maintained annually. Where to begin? Take a look at the seals around windows and doors, and at the siding of your home. You want to see tight seams between door trim and the siding, the window or door and their stops, window sills, thresholds, cracks in siding concrete pads or mortar … the replica watches list goes on. Any time you see a crack in the seal of your home’s materials, it is a place where water, carpenter ants, termites, and other pests can get in. Make a list of any cracks and breaks you find and note their location. Then, take that list to your local home center or good, old-fashioned hardware store so you get the right caulking for each location. Some seals require silicone. On others, mortar should be used. Still other seams require a good latex caulk. Most caulks can come in many colors, making the final finish very nice. Always use the right sealer for the seam in question.

While you’re at it, pick up a really good caulk gun that has a cutting tool, an “off” button and a fold-out “poker” to open the seal in the caulk tube. You don’t want to run around looking for a utility knife or a coat hanger to open a tube of caulk.

When I prepare to do a caulking job on the outside of my olive-painted house, I use a brown-colored paintable latex caulk. I put a few tubes in a 5-gallon bucket, along with my caulk gun, a dust brush, and a damp cloth to use for clean up. With this kit, I can work my way around the house in about an hour. Typically, I can touch up the caulked area with good quality exterior latex paint on the same day. To repair the broken caulking seams, I scrape out loose or failed caulking from the seam, dust it clean, and then apply a new layer of the right type of caulk to the crack. Usually I “tool” it in with my fingertip, making it smooth.

Like caulk, mortar will break down over time, especially in the presence of excess moisture. There are different types of mortar mixes to use. On modern homes, mortar is typically cement-based and very hard. You know it’s been used because if you tap a piece of it, it will make a ringing sound. This cement-based mortar is used against hard-fired bricks that can withstand the pressure of this mortar. Never use this cement mortar to patch old masonry work. Old masonry work requires lime-based mortar, which is softer and won’t damage soft stone or low-fired brick. This mortar makes a very dull sound if you tap a piece of it.

Once you know the mix ratio to use, it’s very easy to mix up a small batch of a cup or two at a time to patch a few seams that may have deteriorated. These small repairs will typically be required around downspouts or other wet areas of the house. Take the time to clean out the old joints, moisten the area, and then carefully tuck the mortar into the seams. Once set but still moist, you can soften the look of the mortar by brushing it with an old dry bristle brush. If the repair requires more extensive quantities of mortar, it’s best to call in a professional because the wrong mortar mix or technique can cause serious damage to the masonry work on your home.

Happy caulking,
The Myers Constructs Team

DIY? Better Think Twice

As a professional design build remodeler, I have seen a lot of do-it-yourselfers (DIY) over the years. In fact, when I was a little girl, I helped my dad, who was a handy home repair guy. He couldn’t keep fresh oil in or useful tires on his cars, but he could tile, paint, renovate a bathroom, and do plumbing work. I remember when he and my grandfather had me on the peak of the roof when I was 8 years old. I was literally scared stiff when my grandfather, a member in the German carpenters’ guild, saw my pale face and suggested my dad get me off the roof “aber schnell” (but fast)!

Read more

Home Maintenance Tip: Air Leaks

This is the best time of year to locate air leaks in your older home. You will know you have them if you can feel drafts, or if your heater is working too hard.

Many people who live in older homes accept the discomfort of leaky windows and doors as “just the way it is” when, in reality, the fixes are very easy and inexpensive to make.

Start by taking a quick tour of your house and identifying the leaks and cold rooms; make a list of those you find. The typical areas of air leaks are any penetration in the “skin” of your home. That could mean a window or door, or a pipe or wire penetrating your home’s walls.

Then, tackle your list one leak at a time to reduce energy use and heating/cooling bills and increase the comfort of your home.

Often, simple chores like caulking, sealing with spray foam or a gasketing system can fix the problem in just a few minutes. If they can’t be fixed that quickly or easily, if a window or door really needs to be replaced, now is the time to start your springtime fix it list. Other less considered sources of air leaks are attic hatches and plumbing trouble doors. Believe it or not, these should be as well sealed (or better) as the doors and windows in your house. Typically, they are nothing more than a plywood sheet = very leaky! Gasketing should be around each of these to prevent air leaking, but still maintain easy use and access. This requires a bit of skill to do well, so call us when you have your fix it list and we’ll get these things done for you.