Random Thoughts on “Big Box” Styling

When you walk through the home furnishings aisles in any of the “big box” retail stores, you will find that textiles, lighting and accessories are all offered in a general color range of brown, beige, or off-white. You may find the occasional splash of low-grade red or green in items like curtains or rugs, but that’s as much diversity of style as you will find.

We find this limited color scheme off-putting, especially when there are so many wonderful small boutique suppliers online and in most towns where you can find better quality items in a much broader color scheme that are created to work with the era of your home.

The following are some pointers on finding good quality, “out-of-the-big-box” materials:

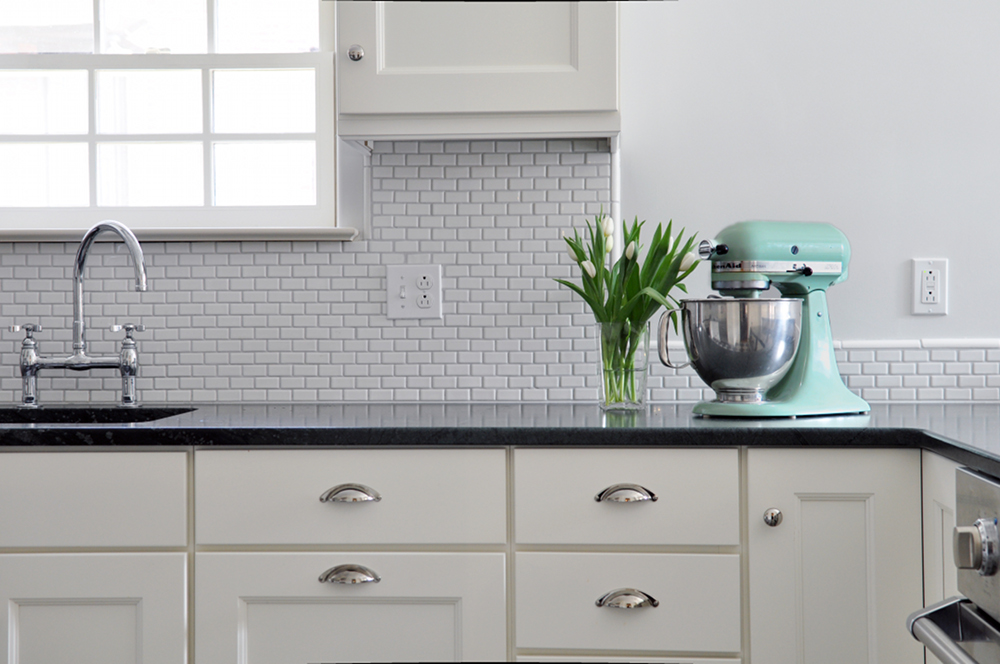
  • Tile. Tile is made of clay with some color added into the mix of the glaze. Better colors, even earth tones, cost more than listless tans and beiges. Similarly, a deep glaze tile costs more than the thin surface on a cheap tile. However, a quality white tile doesn’t cost very much more than an inferior tan tile, yet it looks so much better!
  • Cabinetry. Cabinets that are made of natural materials, like wood, should look like real wood. The finish on a cheap wood cabinet will look more like plastic and will not be deep or interesting to look at. Need a point of reference? Go to any good antique furniture store and examine what the wood looks like. You’ll see French polish, milk paint, varnish, oil or waxed finishes … with no “plastic” on display. Those old pieces have served generations of people and actually increased in their value! If you are looking at painted cabinetry, the signature advantages of good quality products are that they will age gracefully and retain their crisp color over time. Conversely, cheap painted cabinetry will discolor, and the finish will be hard to keep clean.
  • Metal Finishes. Metal is another material group that should never look like plastic. A well-crafted item made of metal will last generations. For example, a 1910 nickel faucet can still be in great working order after it gets a new washer. With age, it will get a soft patina, while a new, high-gloss brass or low-end chrome fixture will have no depth of color, and the surface will quickly pit.
  • Plastic Accessories. Plastic has its place and is perfectly fine for certain uses, as long as it is stable, long-lasting plastic, such as Bakelite, which became popular for use in fashion and industrial design items in the 1920s. New plastics, such as the recent makeover of the classic aluminum Emeco chair, incorporate fewer petrochemicals and more recycled and organic components.

Nelson Lamp Giveaway

We are excited to announce that we’re partnering with Design Within Reach’s Princeton Studio to provide and install a lovely George Nelson Pear Bubble Pendant lighting fixture for one lucky winner.

Architect George Nelson developed this fresh solution to lighting design in 1952 by spray coating a skeleton of steel wire with a layer of translucent plastic that allowed light to shine softly through and protect the eye from glare. The tautly stretched plastic emphasizes the simple form and sculptural quality of the lamp, making it an ideal fit for many different styles of home design. This giveaway, including installation, is valued at $750.

For a complete list of giveaway rules and to enter for your chance to win, please visit our Facebook page. Tell a friend!

Sneak Peek: East Falls Kitchen Photo Shoot

Take a gander at this lovely image from a photo shoot conducted last week by Mark Gisi of Tabula Creative at one of our kitchen projects in East Falls:

We couldn’t be more pleased with the results of the shoot and of the project itself. When we began work on this kitchen, it was suffering from dated 1970s styling and poor cabinet layout and storage design that made the room feel cramped. Contributing to the problem was the fact that the kitchen was sharing space with the laundry facilities, and the room was also uncomfortably cold due to an inefficient heating design. The customers called us in to fix the temperature issues and make the style/design more harmonious with the handsome1920s house. They wanted a true cook’s kitchen with logical storage areas and a relocation of the laundry area. The reconfigured room now features high-end Thermador appliances, white Medallion semi-custom cabinetry designed by Myers Constructs, beautiful soapstone countertops, a classic subway tile backsplash and 13″ Marmoleum tile flooring in a checkerboard pattern. The result is a crisp, clean, classic room with understated modern touches.

Recently, we’ve seen a substantial uptick in customers calling for kitchens like this one. Many of them have years of equity invested into their homes, which they’re leveraging to obtain low-cost home equity loans to finance the renovations. Some are “empty nesters” who finally want to have the kitchen they’ve always wanted. We love these buyers because they really enjoy the process of working with us to select just the right appointments for their long-awaited new spaces.

Beware the “Singular Specialty Expert”

My business partner and I attend a lot of events with other professionals in our industry. Recently, I was at a meeting where a very high-end HVAC contractor was boasting to our group about the $150K geothermal heating and cooling system his company recently installed in a NJ home. The system was top shelf, top price, and his client had no problems paying for it.

Shortly after the new HVAC system was installed, however, his client called to say that one room in his house was still feeling very cold and uncomfortable. The HVAC contractor explained to his client how the system was properly sized and was delivering as designed. The problem, said the HVAC contractor, was that the house was old and not properly weathersealed. So the HVAC contractor then sold his client another $50K in weathersealing to make sure each and every room was finally comfortable.

This story made me wonder why the HVAC contractor didn’t start with an energy audit. This might have cost the client a couple of thousand dollars for a larger home — which I assume it was — but that audit would have suggested weathersealing first, and then HVAC system upgrades, as needed. The new HVAC systems would have then been smaller and less expensive for the newly efficient weathersealed home.

The obvious answer is that this HVAC pro wanted to make the largest sale possible. In fact, he made two large sales: the oversized HVAC system, plus the energy efficiency upgrades to the house.

Make no mistake we are in business to make money, but, at our company, we pride ourselves on helping our clients spend wisely.

A really good residential general contractor is a lot like your family doctor. Just like your family’s GP, it is our job to know the personality of your home, its special flaws and its unique features. We work with you to correct problems in a holistic fashion you can live with. Sure, sometimes, you do have to spend a lot of money on your home. But at other times, the simple, less-expensive solution is the right one. A great GC will pride himself or herself on helping you make the best choice.

Different Customers, Different Outcomes: The Value of a Streamlined Process

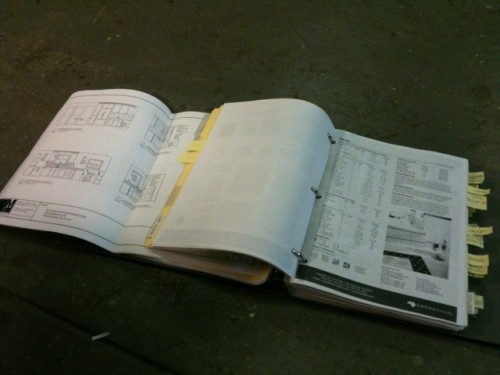
We recently received a phone call from a returning prospective client who had contacted us several months ago about doing a large kitchen/home remodel for her. At that time, we met with this homeowner and explained our process, presenting her with an example of our project book. This is a crucial tool we create for every home renovation project we undertake. It’s kind of the “bible” of the project, as it contains every drawing, specification, permits, and all of the product information necessary to complete the job. During the time since we last spoke to her, the homeowner had explored doing the same project with a home builder who had turned to remodeling after new construction dried up. She found that the builder didn’t use anything like our project book, and the spaces he created were unstylish, builder-grade solutions. So, seeing the value in our approach and appreciating the results we achieve, our prospect came back to us. The project book stuck with her as a symbol of “something different” she would get with us.

On the flip side, we’ve also worked with a handful of clients over the years who do not understand the value of the process and systems we’ve created. At critical periods in our construction schedule, such clients have requested major, project-altering changes in the plans that they had previously approved. When we are beyond the design phase and deep in the throes of construction, it is important for clients to know that products have been purchased, plumbing and electricity have been run, and appliances and cabinetry are ready to be installed – and changes such as these are a very big deal indeed. Of course, we do our best to accommodate such requests, but the results are problematic all around: added expense, delayed completion dates, compromised warranties and so on.

These two very different scenarios highlight the importance of project planning and management systems and finding a contractor with whom you share trust and respect. The process requires a high level of mutual commitment, and that’s why it’s so very important to hire a reputable firm. To read more about this topic, see the Myers Constructs Buyer’s Guide.

Enjoy the holiday weekend,

The Myers Constructs Team

P.S. Spring is just around the corner. The time for planning those warm weather projects is now.

How To Find a Great Remodeler

Here is an account I just received from a new prospect when I asked him how he found us;

“Was watching a remodeling show on television and they mentioned that you should deal with people associated with NARI. I went on the internet and looked for Philadelphia companies associated with NARI and found you.”

You can learn more about NARI here: www.nari.org.

Styling Your Space Like a Pro

Whether you’ve just completed a renovation project or you have an older room that simply needs an aesthetic makeover, if you’re like most homeowners, you may find that you struggle a bit when it comes to furnishing your space and giving it the perfect finishing touches. But make no mistake about it: styling is important. It’s what makes your house feel like a home and what makes guests take notice.

Of course, anyone with the resources can fill a house with a bunch of “stuff.” The difference lies in how the items are arranged. For this reason, even magazines hire stylists to prop rooms to look make them picture perfect. Here, Philadelphia prop stylist Lisa Russell, who helps Myers Constructs make project homes look their best during our photo shoots, shares with us her insights about personal home styling:

Q: How did you get your start in prop styling?

A: After graduating from art school 12 years ago with a degree in photography, I took a job working for an architectural photographer in Philadelphia. After a few days of accompanying him on photo shoots, I learned that even professionally designed spaces had to undergo a transformation process in order to make them “photo worthy.” I also quickly discovered that I was completely addicted to this process. Rugs and furniture would be rearranged, artwork would be moved, and decorative accents would be added or replaced to create just the right balance of size, shape, color and texture. In the photo and film production business, virtually every location undergoes this transformation process.

Q: Why is it important for the average homeowner to understand how to style their homes for everyday use?

A: If our space looks good, we feel good. I’ve encountered many homeowners who believe that it takes an interior designer or high-priced furnishings to make their space beautiful. They feel that if they don’t have the right artwork or the best furniture, then why bother? Whether it’s an entire living room or a shelf on a bookcase, many people struggle with arranging their things in a way that looks pleasing. But what every good prop stylist knows is that you can make anything look good if you simply understand how to arrange it properly.

Q: What are some useful styling tips that most people could easily implement in their own homes?

A: Here are four basic steps to styling any room.

Step 1: Look at the Overall Composition of the Room

This is the “big picture.” When you first glance at a room, what stands out? What seems wrong? You’ll know what it is because your eye will go right to it. It will be the thing that most bothers you. Look at the room from all sides — inside and out — and then arrange furniture so that it’s pleasing from every angle.

Resist the urge to push a sofa or other upholstered pieces up against a wall to get more space. Keeping furniture at least six inches out from the wall will make the room feel bigger. Large cabinets or TV stands, however, should go flush against the wall. The backs of such cabinets are usually not pretty. Now, go out of the room and look back in. Maybe you only see a half of a table when you look in from a hall. Moving it into full view from the hall can give you something interesting to focus on from there.

Next, identify other problem areas, such as a bare bookshelf or console table, or a lifeless sofa. Once you pinpoint the problems, you can start working on solutions. The sofa or chair might benefit from colorful pillows and a throw. Similar colored accents on a side table could also create some interest. A bookshelf may need something mixed in with the books for contrast, such as photos or a vase. This process of analyzing your belongings takes us to Step 2.

Step 2: Learn to Create Vignettes

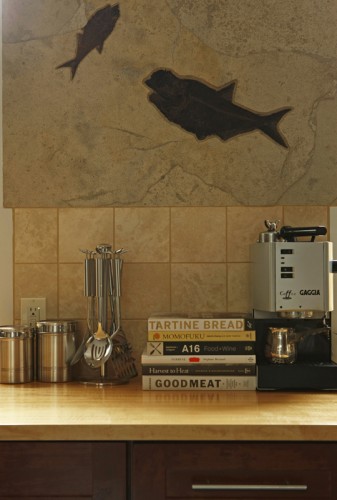
A vignette is a pleasing display of your belongings that tells a story in the context of a room. Look around your home. Are you telling a story of your collections that is visually pleasing? This is a secret talent and obsession that all stylists share. It’s an understanding of how to create a beautiful “still life” on any available surface. While there is a bit of an art to it, to be sure, the bottom line is it all comes down to composition. There are a few simple styling guidelines that can help anyone transform their space and display their objects like a pro:

  • Tips for Table Surface Displays. Whether it’s a coffee table, bookcase or mantle, it’s a blank canvas for your next vignette. Use these tips and start styling.
  • Group objects together. Instead of placing random items far apart, create small groupings to make your collections look intentional and less cluttered.
  • Odds are always better. Placing similar objects in groups of three or five is always better than groupings of two or four.
  • Don’t straight line it. Placing accents in front of one another adds depth. Your objects will not always be viewed straight on, so create visual interest by overlapping them.
  • Mix it up. Don’t be afraid to make your displays eclectic. Random objects often look great together. Two mismatched candlesticks may look odd, but nine mismatched candlesticks will look fantastic.
  • Create balance. Combine small and large items in your groupings. If you have something short on one side of an arrangement, place something tall on the other.
  • Look at magazines. When trying to do this at home, take a look at some design magazines and photos on the Internet. When it comes to professionally designed photos, it’s guaranteed that every single photo has been styled. Look at the displays and study what the stylist has done. Note how many items are on the table or shelf, how they’re arranged, and what kinds of colors and styles are used together.
Step 3: Your Wall Is a Surface

Don’t limit yourself to table surfaces, look at every surface in your room as a potential place for a vignette. While decorating your walls can also seem like tricky business, with the right approach, it can also be a fun, creative process.

  • Start on the floor. When creating an arrangement, begin by laying the arrangement out on the floor.
  • Treat several objects as one. If you were to hang one frame over your sofa, you would center it and hang it at eye level. Treat your grouping of artwork the same way. Center the middle piece of artwork over the furniture and build outward evenly on both sides and above.
  • Follow the two-inch rule. When hanging several pieces of art together as one unit, place each peace of art approximately two inches away from the others, next to, above and below it.
  • Large and small belong together. If you have several large pieces and several small pieces, don’t divide them by size; arrange them together. If you have one arrangement of small pieces and one arrangement of large pieces, the wall will feel unbalanced.
  • If YOU like it, collect it and hang it. We often think of wall art as photos, paintings, or sculptures, but wall art is really anything you can hang on the wall (safely). This could be a collection of pots and pans (my entire kitchen), masks, baskets, plates, and even toys — you name it. Right now, my dining room wall is covered with giant cutout paper snowflakes made out of old wallpaper. I love them, and I’m keeping them (at least until it gets warm out). This takes us to Step 4.

Step 4: Have Fun!

Despite the fact that I talk about rules, the most important thing to do is to have fun with it and don’t take it too seriously. The reason prop stylists enjoy their work so much is because we get to play around with different items and arrangements until it looks just right. In your home, you should do the same. Keep trying until it looks good to you.

Remember also that nothing is set in stone. If you get bored with a particular vignette, clear the surface and start again. Rearranging your bookcase or mantel is a great way to use some creative energy without spending a dime.

Q: Are there any resources you would recommend for homeowners who want to learn more?

A: There are resources everywhere. There seems to be an online design magazine for every style out there. I literally have hundreds of sites bookmarked on my laptop, but these are my top four for both inspiration and practical application:

  1. www.designsponge.com
  2. www.housetohome.co.uk
  3. www.decor8blog.com
  4. www.anthologymag.com

Lisa Russell is a West Philadelphia-based prop stylist, set decorator, and writer specializing in interiors, still life and food styling for print and television. With a background in photography, graphic design and marketing, she brings the artist’s and the audience’s perspective to every shoot. Some of her clients include IKEA, Benjamin Moore, Hyatt Hotels & Resorts, Brownstein Group, Arm & Hammer, Philadelphia Magazine, Taste of Home Magazine, Wine and Spirits Quarterly, QVC and others. When she’s not working, she can be found indulging in her guilty pleasures, which include flea markets, vintage textiles, clean design, sewing, re-purposing old furniture, and using objects in ways for which they were not intended. Samples of Lisa’s work can be seen at www.stylingbylisa.com.

Video Clip: Tamara Myers Interview

Tamara, who serves as Chair of the Membership Committee for the DelChester chapter of NARI, recently sat down with NARI’s Morgan Zenner at the National NARI 2012 CotY judging to discuss Myers Constructs, and the role NARI membership and certification plays within the company.

Watch it here.