Design-Build Restoration: The Sum of Many (Moving) Parts

1402251439_door.view_540x369_
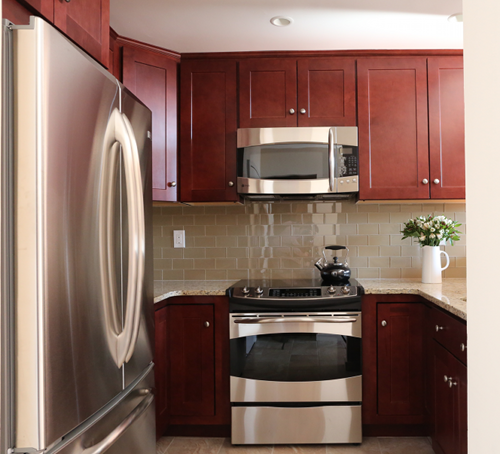
We are currently working on a complex Fairmount area project with many smaller elements that all tie together. We are redoing a kitchen and breakfast room; removing an outhouse and old pantry; making a small addition into the yard; renovating a second-floor laundry/bathroom; correcting the drains and electric leading from each of those areas into the basement, replacing the house’s main drains and soil lines; and restoring a storm-damaged cupola bay — and likely fixing collateral damage done to a roof, roof deck, and skylights.

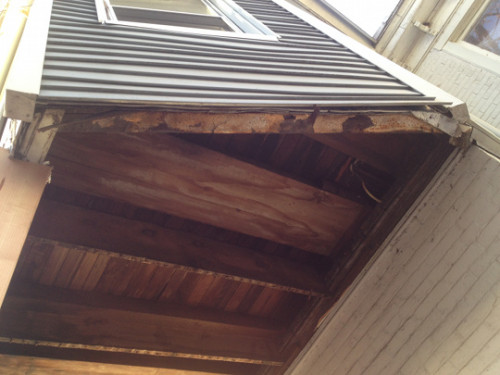
When we first visited the house, the homeowners told us they’d been thinking about a whole-house renovation for a long time. But, like many people considering such projects, they didn’t really know where to start. Mother Nature gave them their first step when a major storm tossed a huge tree limb at their cupola/bay, leading them to call us for help.

A few years ago, the couple had hired an architect to draw up a set of plans for this project. While many of the stylistic schemes in those plans made sense for the style of the house, many of the other details did not fit the way this family actually lives in their home. The drawings called for a clean-line, minimalist design, yet their home is a vivacious place filled with many belongings they love to look at and enjoy. This family needed a house that helped them appreciate their beloved items and experiences, while at the same time giving them room and storage for things they might need to stow. An architect’s dream of a minimal streamlined house was not going to work for this creative, zesty family.

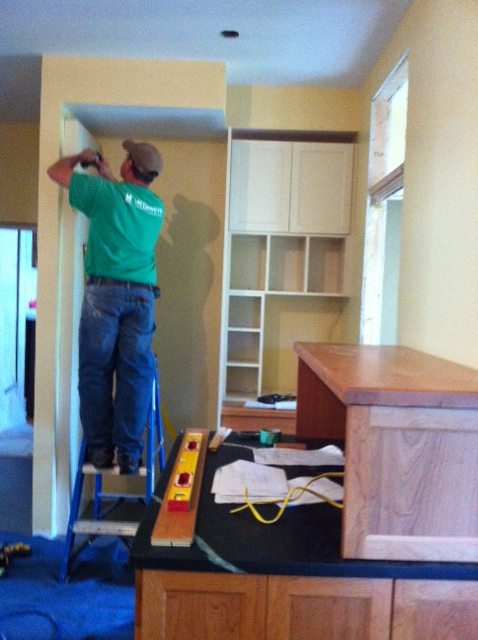
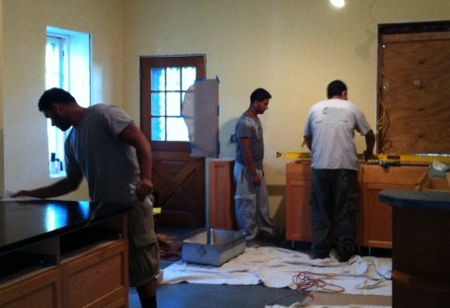
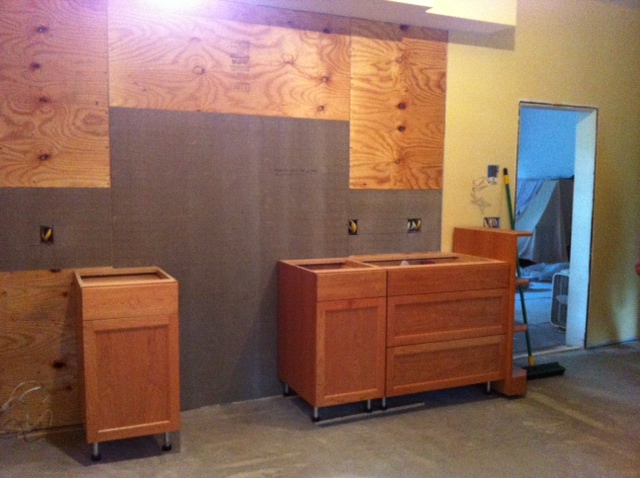
Our design team has been working with the homeowners during the past few weeks to pull together a plan that suits this family. While the design and product selections are taking place, the production team has been quite busy tending to these tasks:

  • reframing the bay/cupola
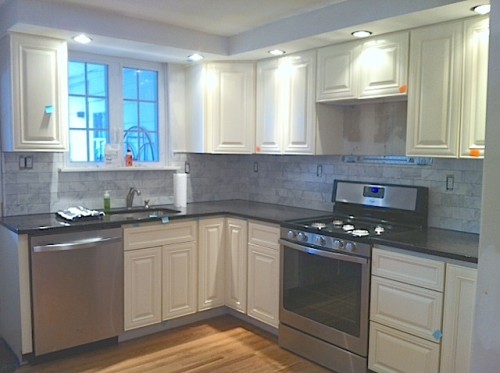
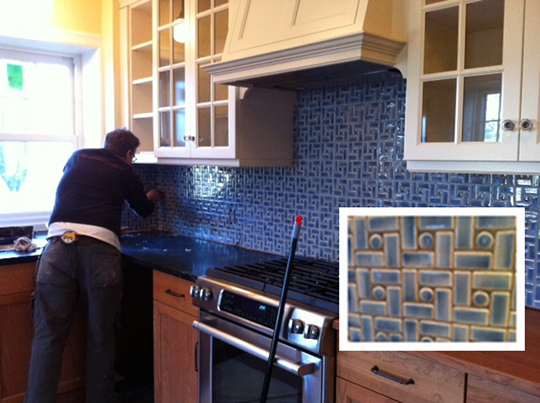
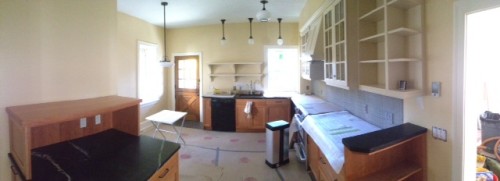
  • completing demolition to the new kitchen, breakfast room, bathroom/laundry
  • starting electrical work to rewire the new sections and existing sections of the house
  • installing new drain lines and roughed in new plumbing
  • scheduling engineering surveys

…. as well as lining up the next phases of the project:

  • masonry
  • structural repairs
  • framing
  • drywall
  • roofing
  • a total rewire of the house, including CO and smoke detectors, cable, and phone

You can see how the story of this family’s project highlights the efficiency and effectiveness of design-build approach to home renovations.

Restoration: Storm-Damaged Historic Fairmount Cupola

replica watches

Crash! Just like that, our clients’ cupola was hit by a large section of the tree from a neighbor’s yard when it toppled during a recent storm. The treetop came smashing through two skylights, giving the main section of the bay a real bump.

When we came to survey the damage, we found that the bay had been covered at some point in vinyl siding and lots of tar paper and muck, all of which were hiding bigger issues and problems. Often, we find that coverups like these don’t keep out water, so they can add to the problems they are covering up. That was the case with this little structure. The framing was rotted in many places because the old wooden windows had been replaced with leaky aluminum sashed windows. And once the tree hit the cupola, the windows on the side of the bay were about 1-1.5 inches out of square, so they no longer worked. And these replica watches are affordable for men.

We spent a week re-shoring the cupola and then taking off the many layers of siding. We then removed the bad replacement windows and many layers of tar paper roofing. The interesting clerestory windows were taken to our lumber yard to be either rebuilt or repaired. Now, we are in the process of shoring up the space from the inside, and then reframing it with new lumber within the old proportions.

Because the house is located in a Philadelphia historic district, we need to obtain approval for the windows and exterior details like moldings and paint colors before we complete the job. We work with Historical Commission often, so we understand that they want anything that can be seen from the street to look like the original elements would have. That’s the way we prefer it, too!

Pocket Doors: A Great Space-Saving Solution

Pocket Door

Consider this surprising fact: The average single swinging door gobbles up about 11 square feet — or around 1% — of a room’s usable floor space. That means you can’t put anything within this radius of the swinging door if you want it to open and close. When you realize that most houses have several swinging doors, you find that the loss of usable square footage really adds up quickly, particularly in smaller homes.

By contrast, a pocket door only takes up the space of the actual door itself, and only then when it’s in use. Otherwise, it is tucked away, and the floor space is open.

Of course, pocket doors aren’t always the right answer, but we find them to be a brilliant space-efficient design solution, given the right circumstances. You first need to have an empty wall cavity into which the door will slide. Many interior walls have pipes, wires, or other obstructions inside them, while exterior walls are usually not suitable because they would allow hot/cold air into the living space of the house, and they are often made of brick or stone with no cavity.

Pocket doors are also fussy, so they have to be installed and adjusted properly. We find that the cheaper pocket door hardware always fails, so we insist on high-quality hardware and taking the time to install it right. We also ensure that the door jamb components are removable so the hardware can be serviced in the future.

In the case of the kitchen shown here, our clients wanted a pantry and closet that was separated from their large kitchen because their first floor had no coat storage at all. While this space is only about 4’x7′, we were able to provide a lot of storage because the room is tall with ceilings over 9′. You can’t tell from the picture, but there is an unused stairwell to the left, which was perfect for pantry shelves.

To keep our closet solution from feeling squat and gloomy, we ordered a special tall glazed and paneled door and had a multi-pane window made for the transom above. This allows a copious amount of light to spill into the kitchen all throughout the day. We also installed the same type of light fixture in the closet ceiling that we put into the kitchen to make it feel like a nicely finished room, and not an afterthought. This closet door can be left opened or closed and still look appealing because all of the colors and finishes are the same as in the kitchen, and everything inside is now organized and tidy.

Finally, we capitalized on the extra 11 square feet of space in front of the closet by adding a small home office desk area. Now that’s what we call efficient design!

Weekly Wrap Up: Whitemarsh Kitchen

Whitemarsh kitchen

We are working this week on the final touches for this wonderful, modest-sized Lafayette Hill kitchen. What began as a fairly cramped space is now more comfortably sized, thanks to the removal of a non-load-bearing wall between the kitchen and dining room.

Last “to do” items for this project include:

  • Grout the honed Carrara subway tile
  • Electrical trim out
  • Install the micro hood
  • Install the knobs
  • Final coat the all-new oak floor

To keep their budget in check, the homeowners decided to handle the painting themselves. And since their appliances were fairly new, we were able to reuse everything but the garbage disposal. Cost-cutting measures such as these equate to a project that is within reach for most folks!


P.S. Spring is right around the corner (finally!). Here are some seasonal projects you should be thinking about in your own homes: Spring “To Do” List: Projects Big and Small

A Day in the Life of a Kitchen Remodel — Step 13: Tile

Custom kitchen backsplash tile

This week, we’re completing the finishing touches on our Mt. Airy kitchen. The crew installed this beautiful ceramic tile backsplash, which serves as a nice transition between the upper painted glass-front cabinetry and lower cherry-stained cabinets. As you can see in the close-up view, the tile pattern features a combination of rectangular and circular shapes in gradated shades of blue — providing a nice focal point for the space!

In the next few days, we will wrap up the last bits of this project so the clients can enjoy their new kitchen for the holidays.


Revisit previous updates on this project:

Step 1. Planning
Step 2. Demolition
Step 3. Insulation and Framing
Step 4. Prepping for Inspection
Step 5. Pre-Closing
Step 6. Drywall
Step 7. Cabinetry
Step 8. Cabinetry Pre-Installation
Step 9. Cabinetry Completion, Countertop and Flooring Prep
Step 10. Final Installations
Step 11. Detail, Trim Work, Appliances
Step 12. Finishing Touches

A Day in the Life of a Kitchen Remodel — Step 12: Finishing Touches

Panorama View of the Kitchen

We are excited to announce that we’ll be taking the wraps off of our Mt. Airy kitchen project today or tomorrow. The only outstanding item, at this point, is the beautiful backsplash tile, which is expected later this month. Our carpenters are now busy packing their equipment and materials off site as they tackle the last small hardware items and other details.

Revealing a finished room can feel a little like opening a big gift on Christmas morning. Exciting stuff for both us and the clients! We look forward to seeing how the homeowners “move in” to their new space, which incorporates plenty of open shelving, room for artwork, and expansive counter spaces. Stay tuned for the final finished photo later this month!


Revisit previous updates on this project:

Step 1. Planning
Step 2. Demolition
Step 3. Insulation and Framing
Step 4. Prepping for Inspection
Step 5. Pre-Closing
Step 6. Drywall
Step 7. Cabinetry
Step 8. Cabinetry Pre-Installation
Step 9. Cabinetry Completion, Countertop and Flooring Prep
Step 10. Final Installations
Step 11. Detail, Trim Work, Appliances

New Life for an Old City Condo

condo_kitchen_renovation_

We’re in the process of wrapping up a large-scale makeover on this sunny condominium in Philadelphia’s charming Old City neighborhood. The homeowners, who have lived here for at least 15 years, recently retired and wanted to make some upgrades as they begin the next phase of their lives. Because the condo was built in the 1980s, some of the elements — particularly in the kitchen and bathrooms — were feeling dated to our clients.

  • Paint throughout the entire unit
  • Cherry-colored maple cabinets
  • GE appliances
  • Stone style ceramic tile flooring in the kitchen and entry, which will keep these high-traffic areas easy to clean
  • Cherry floating engineered flooring throughout the bedrooms and main rooms
  • Bathroom vanities, sinks, toilets, granite counters, and new chrome fixtures and accessories
  • New lighting layout, including attractive ceiling fans for the larger rooms
  • Closet organization systems

Now that these larger pieces of the project are complete, Tamara will work with the clients on choosing the proper window treatments for their 8′ tall windows. Not only do the windows let in a tremendous amount of light due to southern exposure, but they also make the condo feel drafty.

It was gratifying to be able to help these folks head into retirement in their newly styled and redefined space.

P.S. Our Mt. Airy kitchen project was featured in The Philadelphia Inquirer this week!

A Day in the Life of a Kitchen Remodel — Step 11: Detail, Trim Work, Appliances

finishing.up_Now that the cabinets are installed in our Mt. Airy kitchen, the project is coming to a head. Here is what’s happening this week:

  • Installation of extra bits and bobs on the cabinets, such as spacers and trim
  • Minor drywall/carpentry work
  • Installation of a transom window, a window to the outside, and three doors
  • Trimming out the windows, baseboards, and plumbing and electrical work
  • Installation of appliances

This is what we call “a hatful” of work. We depend on everyone being on schedule and working together to get it done. It is important for everyone to work cleanly and carefully so no damage happens to the finished products.

This is also the second most stressful time for the customers because they can see all the nice shiny new stuff, and their room looks like it should be ready to use, but it’s not quite there yet. All of these wee things still need to happen. We’re keeping the clients up to date during this furious crescendo. It’s not an easy time for anyone … but it’s all well worth it in the end.

Stay tuned to our facebook page for photos of the finished space!


Revisit previous updates on this project:

Step 1: Planning
Step 2: Demolition
Step 3: Insulation and Framing
Step 4: Prepping for Inspection
Step 5: Pre-Closing
Step 6: Drywall
Step 7: Cabinetry
Step 8: Cabinetry Pre-Installation
Step 9: Cabinetry Completion, Countertop and Flooring Prep
Step 10: Final Installations

A Day in the Life of a Kitchen Remodel — Step 10: Final Installations

1309241121_

The early part of this week is being spent confirming details on our Mt. Airy kitchen and ensuring that subcontractors arrive on time, in the proper order, and finish on schedule. The flooring will go in on Wednesday, the stone on Thursday, and the wall and tall cabinets on Friday.

Timing is everything at this point. The kitchen counters need to go in before the wall and tall cabinets because some of these cabinets actually sit on the countertops. Likewise, the stone can’t go in until the floor is complete because a couple of base cabinets had to be removed to get the floor in. This equates to a lot of juggling and communication between multiple parties — one of the key reasons why it’s important to have an experienced general contractor handling a complicated job like this. Sometimes, there are crazy little loose ends that come up. In fact, there was a sink installation detail to clarify just this morning. So we are in touch with the customers about that even though they are out of town.

This is the real crunch time in the project. Once we get these last big strokes done, it’s all paint and trim and fun stuff from here. Follow along on our facebook page for pictures of the final stages of this kitchen!


Revisit previous updates on this project:

Step 1: Planning
Step 2: Demolition
Step 3: Insulation and Framing
Step 4: Prepping for Inspection
Step 5: Pre-Closing
Step 6: Drywall
Step 7: Cabinetry
Step 8: Cabinetry Pre-Installation
Step 9: Cabinetry Completion, Countertop and Flooring Prep

A Day in the Life of a Kitchen Remodel — Step 9: Cabinetry Completion, Countertop and Flooring Prep

puppy pads

If you are following our Mt. Airy kitchen renovation on Facebook, you know that the cherry base cabinets were unloaded and installed late last week. Because the upper cabinets are painted, they were finished at the factory in a second run and will be delivered shortly.

Also this week, the flooring pro is scraping, sanding, priming, and sealing the Gypcrete floor underlay in preparation for the installation of the Forbo Marmoleum floor. The stone and wood counters are being templated on Wednesday, and the carpenter will return to the puppy pads site this week to double-check a few items on his list that need to be perfect before the rest of the cabinets and counters are installed.

We will next need to temporarily remove a couple of base cabinets for the flooring to be installed. This is because the flooring material can only be manipulated so much before it cracks, so we need to provide extra clearance. Bespoke projects can be a bit of a juggling act. Sometimes, there is a bit of back and forth to get the fit just right.

Have a wonderful week,

The Myers Constructs Team


Revisit previous updates on this project:

Step 1: Planning
Step 2: Demolition
Step 3: Insulation and Framing
Step 4: Prepping for Inspection
Step 5: Pre-Closing
Step 6: Drywall
Step 7: Cabinetry
Step 8: Cabinetry Pre-Installation